Cake mix cupcakes are a super easy & quick way to make delicious snacks and desserts. Since a box of cake mix contains premeasured ingredients, it cuts down on measuring mistakes, speeds up your prep and ensures more consistent results (e.g. reduces variations caused using fluffed flour versus compacted flour). This is perfect for beginning bakers and people in a rush.
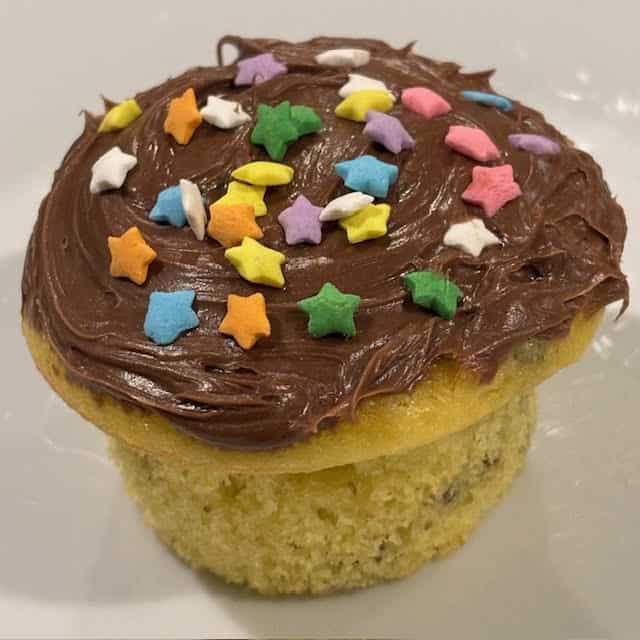
Frosting & Sprinkles Added By My 4 Year Old Niece! Good Job!
Recipe Sections
I had leftover yellow cake mix after making my popular Cake Mix Banana Bread. So my 4 year old niece and I decided to make some cupcakes together. She was my decorating expert! This was a fun family project.
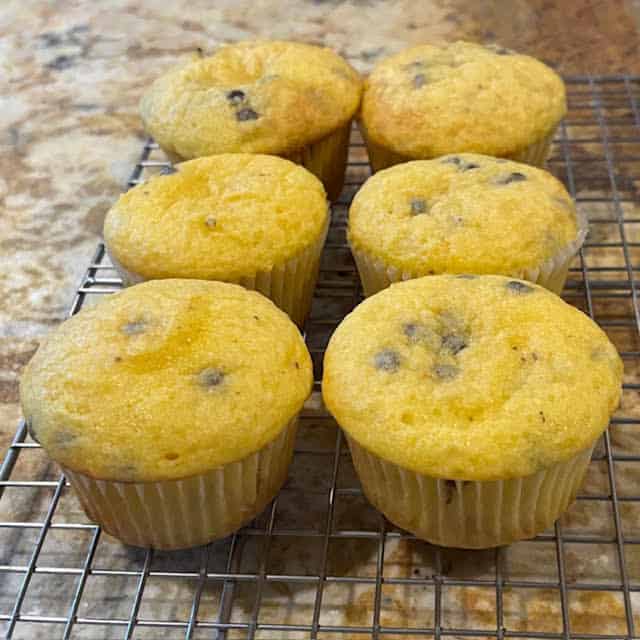
Cake Mix Cupcakes (with Chocolate Chips) – Before Adding Optional Frosting
FYI – Cupcakes have a great advantage over cakes and banana breads – they are generally quicker to bake! Moreover, using a box of cake mix to make cupcakes cuts down on prep time. Why? Because many of the ingredients (e.g. flour, sugar and baking soda) have been premeasured and are ready to use.
Ingredients
- 3/4 Cup – Milk – You can use dairy milk or non-dairy milks (such as soy milk or oat milk).
- 1/2 Cup – Unsalted Butter (softened) – Or you can use a neutral-flavored vegetable oil (such as corn oil or mild olive oil). See tips section below for more information.
- 3 – Large Eggs – Not extra large or jumbo eggs.
- 1 Box – Yellow Cake Mix – 15.25 oz box of cake mix – You can also use chocolate cake mix, vanilla cake mix, etc.
- Optional – 3/4 Cup of Mini Chocolate Chips – I prefer to use mini chips. However, you can replace the mini chips with 1 cup of regular-sized chocolate chips. See tips section below for more info (e.g. differences in amounts used for mini chips versus regular-sized chip).
- Optional – Frosting – My family likes chocolate frosting. However, you can also use vanilla frosting, cream cheese frosting, etc. Use the frosting that your family prefers!
- Optional – Sprinkles – Sprinkles are fun way to make cupcakes look even better (according to my 4 niece)!
Servings – Roughly 12-18 standard cupcakes (non jumbo). Amount depends on whether extra ingredients were added (e.g. chocolate chips or chopped walnuts), the size of cupcake cups/wells, how much batter was added to each cupcake cup/well, etc.
Equipment Needed – Measuring cup & spoons, mixing bowl, long wooden spoon, cupcake or muffin trays, paper cupcake or muffin liners (baking cups), oven mitts, cooling racks and an oven.
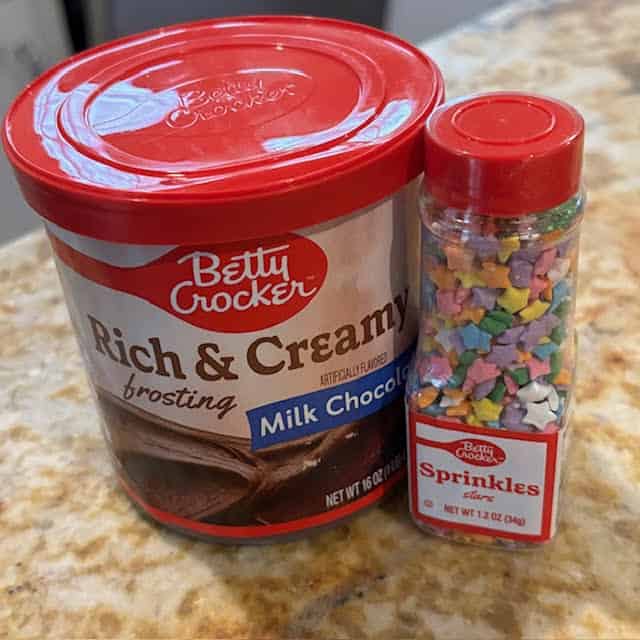
Optional Ingredients – Frosting & Sprinkles
Instructions
- Preheat oven to 350 degrees F (177 degrees C).
- Lightly beat eggs.
- Soften the butter to room temperature. FYI – I like to partially melt the butter in my microwave for better mixability. However, do not turn it completely into a liquid. You want the butter very soft but not fully melted. See the tips section below.
- Add the milk, butter, eggs and finally the cake mix into a large mixing bowl. Stir with a large wooden spoon until completely mixed. FYI – I don’t like to use an electric mixer for this recipe because it can overmix the batter. However, if you do use an electric mixer, you should only use it on a low speed and for a very short time.
- Optional – Stir in 3/4 cup of mini chocolate chips (or 1 cup of regular-sized chocolate chips).
- Place paper baking cups (liners) inside cupcake trays (or muffin trays). If you do not have paper baking cups or very good nonstick trays, you should grease the trays with butter or cooking spray.
- Add the batter to the baking cups until each cup/well is about 60% to 65% full (roughly two thirds) with batter. FYI – See tips section below on why you don’t want to fill the baking cups with more than two thirds (2/3) batter.
- Place the trays into the oven.
- Bake the cupcakes for 20 to 22 minutes at 350 F (177 C).
- Remove the trays from the oven. Use oven mitts when removing the trays.
- Allow the cupcakes to cool inside the trays for 4 to 5 minutes. FYI – This lets the cupcakes firm up (so they are easier to move without breaking or crumbling).
- After the 4 to 5 minutes, remove the cupcakes from the trays and place them on a wire cooling rack in order to completely cool. FYI – It can take 45 to 60 minutes for the cupcakes to completely cool.
- Optional – After the cupcakes have completely cooled, spread frosting on each cupcake top. Then place some sprinkles on top of each frosted cupcake.
- Please read the tips below to avoid common cupcake mistakes & to learn about different variations that you can make with these cupcakes.
If you liked this recipe, please leave a comment below & give us a 5 star rating. Jump to comment section
📌 Save this recipe – Bookmark or pin it
| ❤️Love bread machine recipes? Then subscribe to my Bread Dad newsletter |
Batter in Cupcake Tray

Helpful Tips
- The tips below are designed to help cupcake “novices” and/or people with limited baking experience.
- Click on this “print recipe” link if you want to print out this recipe. It includes all of the recipe’s ingredients and instructions. However, the recipe print function does not include my tips section. Please read the tips section in order to avoid common recipe problems.
- This cupcake recipe is part of Bread Dad’s series on Easy Muffin & Cupcake Recipes such as banana muffins.
- Cake mix is a prepackaged mix that already contains premeasured amounts of sugar, flour, salt, baking soda, etc. This saves steps as you don’t have to run around looking for missing ingredients and/or reduces measuring errors since everything is premeasured at the factory.
- Cake mixes are also pretty inexpensive (especially if you don’t want to buy a giant bag of flour or sugar).
- I usually use a 15.25 ounce box of yellow cake mix from Duncan Hines or Betty Crocker in order to make cake mix cupcakes. However, there are many other types of cake mixes that you can try (e.g. white cake mix, chocolate cake mix, pink velvet cake mix, etc.). FYI – The 15.25 ounce box that I use holds roughly 3 cups of cake mix.
- Of course, if your family doesn’t like the taste of cake mix (e.g. yellow cake mix), they probably won’t like this recipe. Therefore, choose a cake mix that your family actually likes and experiment!
- Visitors – What type of cake mix did you use to make your cupcakes? Yellow cake mix? Chocolate cake mix? Vanilla cake mix? Other? Please post your cake mix favorites & tips in the comment section below.
- I like to use mini chocolate chips when making these cake mix cupcakes (instead of using regular-sized chocolate chips). Why? Given their lighter weight, mini chocolate chips are usually more evenly distributed (better spread out) in cupcakes. In contrast, larger & heavier regular-sized chocolate chips may sink to the bottom of yellow cake mix cupcakes.
- HOWEVER, if you don’t have mini chips, feel free to use regular-sized chocolate chips. If you decide to use regular chocolate chips, you should use 1 cup of regular chocolate chips (versus the 3/4 cup of mini chocolate chips called for in the recipe).
- If you didn’t know, 3/4 cup of mini chocolate chips equals roughly 1 cup of regular-sized chocolate chips. Why? Because there is more air ‘pockets” between the larger regular chips. There is less air between the smaller mini chips and thus there is a greater density of chocolate.
- Optional – You can replace the chocolate chips with 1 cup of chopped walnuts or chopped pecans in order to make yellow cake mix cupcakes.
- Optional – Some people like to add 1 cup of dried fruit (e.g. dried cranberries) instead of chocolate chips or chopped walnuts to these easy cupcakes.
- Visitors – What do you add to your cake mix cupcakes in order to make them special? Chocolate chips? A special frosting? Chopped walnuts? Extra sprinkles? Please post your cupcake tips & suggestions in the comment section below.
- My recipe differs from the “cake” instructions on many cake mix boxes. For example, I use milk instead of water in order to add more flavor. You can use dairy milk or a plant-based milk (e.g. oat milk or soy milk). Just use a milk that your family enjoys the taste of.
- I also like to use butter instead of vegetable oil because it gives yellow cake mix cupcakes a more classic & buttery flavor.
- However, please feel free to use a neutral-flavored vegetable oil if you want to cut down on the saturated fat in these easy cupcakes.
- If you want to make the cupcakes even softer, you can use buttermilk instead of milk. The slight acidity of the buttermilk helps to tenderizes the gluten in the flour of the cake mix cupcake and this creates a softer cupcake.
- When adding butter to the mixing bowl, the butter should be soft. Soft room temperature butter works best. FYI – Room temperature butter helps to create an airier cupcake (because it is better at trapping small air bubbles during the mixing process) when compared to using melted butter.
- However, I do not have the patience for refrigerator cold butter to warm up to room temp (as this can take 30 to 60 minutes).
- Therefore, as I stated in the instructions, I like to soften the butter by partially melting the butter in my microwave. However, you should only microwave the butter for only a very short time (as you do not want to fully melt the butter).
- Do NOT use fully melted & very hot butter. Very hot butter can partially cook the eggs!
- Optional – Use your family’s favorite frosting to decorate these easy cupcakes. My family likes chocolate frosting. However, you can also use vanilla frosting, buttercream frosting, etc.
- Do not add frosting to the cupcakes until the cupcakes are COMPLETELY cooled. Otherwise, the frosting will melt or slide off and your cupcakes will look very messy.
- How to add frosting – You can use something simple like the back side of a spoon, a small spatula or a butter knife in order to spread the frosting on the cupcakes. Or you can use more advanced decorating tools such as piping bags or decorating plungers/injectors.
- If you need some help on how to add frosting to cupcakes, here are links to some YouTube instructional videos:
- How to add frosting with a spatula
- How to add frosting with a spoon
- How to add frosting with a butter knife
- How to add frosting with a piping bag
- How to fill a piping bag with frosting
- Visitors – What type of frosting do you like to add to these easy cupcakes? Please post your frosting suggestions & tips in the comment section below. Your ideas are a great help to beginning bakers.
- Optional – To add a different look to these easy cupcakes, you can place some colorful sprinkles on top of the frosting.
- Optional – Or you can sprinkle on some mini M&Ms. Just remember to avoid using anything large (e.g. candy) in order to avoid potential choking problems.
- Optional – Or if you do not have sprinkles, you can add some coarse sugar (e.g. turbinado sugar) for a different look and texture. Crunchy!
- Other topping ideas – Mini marshmallows, crushed up graham crackers (into very small bits), very small bits of chopped up strawberries, etc.
- Just keep everything very small (to avoid potential choking problems) if you have young children.
- Visitors – What do you like to add on top of your cupcake frosting? Sprinkles? Mini M&Ms? Coarse sugar? Other? Please post your topping ideas in the comment section below.
- Only fill the cupcake well/cup about 60% to 65% full with batter (roughly two thirds) in order to get a classic cupcake. If you add any more batter to the cupcake well/cup (e.g. so the cup/well is 70-100% full), you will get a “mushroom” top (where the cupcake has overflowed the top of the cup/well and spread out on the tray). This can look good on some types of muffins. However, it does NOT work well with cupcakes (if you are adding frosting). The edges of the mushroom top will break off when you try spreading on some frosting.
- There are a variety of ways to pour the batter into the cupcake trays or muffin trays. For example, you can use an ice cream scoop with a trigger release, scoop with a spoon (while using another spoon to scrape off the batter into the cupcake tray), use a small cup and spoon, use a homemade “pastry bag” to squeeze the batter into the cupcake wells/pockets, etc.
- Use paper baking cups (cupcake & muffin liners) if you want to easily extract the soft & moist cupcakes from the cupcake trays (muffin trays). This also helps to prevent the cupcakes from sticking to the bottom of the cupcake tray.
- You can use cupcake trays or muffin trays to make this recipe. Muffin trays have slighter larger cups/wells versus cupcake trays. Just be sure to use paper baking cups that match the size of the tray’s cups/wells.
- If you want to test these easy cupcakes to see if they are fully baked, you can use a digital “baking” thermometer. Cupcakes are usually fully baked if their internal temperature is around 205 F to 210 F. If the temperature is below this then they will be underbaked and if it is above this range, they might be overbaked and dry. For the most accurate results – Place the tip of the digital thermometer in the center of the cupcake.
- You should use relatively FRESH cake mix. Do NOT use an old cake mix that has been sitting in your pantry for months. The flour in old cake mix can go rancid, the baking soda/powder in old cake mix can lose its potency over time, the cake mix can smell/taste strange & stale, etc.
- Benefits of cake mix – The premeasured ingredients in a box of cake mix cuts down on prep time, reduces ingredients measuring errors and helps to create more consistent baking results.
- You probably already know this but baking speed is a key advantage for cupcakes over cakes. Smaller cupcakes bake faster than larger cakes. So many people make cupcakes when they need a “quicker” snack!
- Downside to cake mix – You can’t adjust the ingredients in the mix very well. You are basically stuck with the premeasured ingredient amounts in the cake mix. This means that you can’t easily tweak the recipe (e.g. cut the sugar in the cupcakes).
- If you like baked goods made with cake mix, you should check out Bread Dad’s recipe for Cake Mix Banana Bread. It is a super easy to make. Moreover, cake mix banana bread tastes more like a banana cake (versus a dense traditional banana bread).
- Or check out my recipe for Cake Mix Muffins. Cake mix muffins are easy & quick to make. You can make them with fresh blueberries, cranberries, chopped walnuts, etc.
- Cake mix cupcakes are a fun project for kids – You can let them add the optional frosting and sprinkles to the cake mix cupcakes. I just give them a couple of spoons (one to spread the frosting and the other to add the sprinkles) and then let the fun (mess!) begin.
- I prefer to use a large wooden spoon to mix this recipe. An electric mixer can overmix the ingredients and the cupcakes can turn out rubbery & gummy. Technically – An electric mixer can overmix the gluten in the flour. If you do use an electric mixer, you should only use it on a low speed and for a very short time.
- Make sure that your oven has been completely preheated. If the oven has not been properly preheated, this quick bread could come out undercooked. Use an oven thermometer (e.g. one that hangs inside your oven) to check the interior oven temperature before baking. Depending on the size of your oven & temperature used, it can take 15-20 minutes before your oven is fully preheated.
- Portable oven thermometers are also great for telling if your oven temperature matches what you set on the oven temperature dial. Some ovens (esp. older ovens) can be off by 25+ degrees.
- If you have a problem with a recipe, please make sure that you are following the recipe exactly (e.g. using the correct oven temperature), using the correct amounts of ingredients (e.g. don’t eyeball the measurements versus using a measuring cup or accidentally add a tablespoon when a teaspoon is called for), using the correct ingredients, etc. Please don’t “wing” things with recipes.
- My recipes are based on US ingredient measurements (e.g. US cups & tablespoons). However, as a courtesy to our European visitors, I have also included some very ROUGH European equivalents (e.g. grams & milliliters). Since I rarely use European measurements when baking, please let me know in the comment section below if any of the European ingredient measurements need to be changed (e.g. for XYZ ingredient, milliliters are more commonly used versus the grams information listed in the recipe).
- Always wear oven mitts/gloves when dealing with a hot oven, hot trays, etc.
- For more easy recipes, please visit Bread Dad’s main Muffin Recipes section.
If you liked this recipe, please leave a comment below & give us a 5 star rating. Jump to comment section
| 📌Follow Bread Dad on Facebook for recipes & baking tips! |
Want More Recipes? Try These Next
- Bread Machine Recipes – 90+ recipes for banana bread, sourdough bread, pizza dough, cinnamon raisin bread, etc.
- Bread Recipes – French bread, buttermilk bread, bagels, Italian bread, etc.
- Banana Bread Recipes – 60+ recipes for banana nut bread, eggless banana bread, chocolate chip banana bread, etc.
- Quick Bread Recipes – Recipes using baking soda such as pumpkin bread, cranberry bread, etc.
| Made this recipe today? Snap a photo & show it off on my Facebook page! |
Reference Sources
- Wikipedia, Baking Mix (Cake Mix)
- Wikipedia, Cupcake

Cake Mix Cupcakes – Quick & Easy Recipe
Ingredients
- 3/4 Cup Milk – You can use dairy milk or non-dairy milks (such as soy milk or oat milk).
- 1/2 Cup Unsalted Butter (softened) – Or you can use a neutral-flavored vegetable oil (such as corn oil or mild olive oil).
- 3 Large Eggs – Not extra large or jumbo eggs.
- 15.25 Ounces Yellow Cake Mix – 15.25 oz box of cake mix – You can also use chocolate cake mix, vanilla cake mix, etc.
Instructions
- Preheat oven to 350 degrees F (177 degrees C).
- Lightly beat eggs.
- Soften the butter to room temperature. FYI – I like to partially melt the butter in my microwave for better mixability. However, do not turn it completely into a liquid. You want the butter very soft but not fully melted.
- Add the milk, butter, eggs and finally the cake mix into a large mixing bowl. Stir with a large wooden spoon until completely mixed. FYI – I don't like to use an electric mixer for this recipe because it can overmix the batter. However, if you do use an electric mixer, you should only use it on a low speed and for a very short time.
- Optional – Stir in 3/4 cup of mini chocolate chips (or 1 cup of regular-sized chocolate chips).
- Place paper baking cups (liners) inside cupcake trays (or muffin trays). If you do not have paper baking cups or very good nonstick trays, you should grease the trays with butter or cooking spray.
- Add the batter to the baking cups until each cup/well is about 60% to 65% full (roughly two thirds) with batter. FYI – See tips section below on why you don't want to fill the baking cups with more than two thirds (2/3) batter.
- Place the trays into the oven.
- Bake the cupcakes for 20 to 22 minutes at 350 F (177 C).
- Remove the trays from the oven. Use oven mitts when removing the trays.
- Allow the cupcakes to cool inside the trays for 4 to 5 minutes. FYI – This lets the cupcakes firm up (so they are easier to move without breaking or crumbling).
- After the 4 to 5 minutes, remove the cupcakes from the trays and place them on a wire cooling rack in order to completely cool. FYI – It can take 45 to 60 minutes for the cupcakes to completely cool.
- Optional – After the cupcakes have completely cooled, spread frosting on each cupcake top. Then place some sprinkles on top of each frosted cupcake.
- Please read the recipe's tips section on Bread Dad (BreadDad.com) to avoid common cupcake mistakes & to learn about different variations that you can make with these cupcakes.
Notes
Nutrition
Related Recipes
- Cake Mix Banana Bread
- Banana Muffins
- Banana Nut Muffins – Chopped walnuts
- Blueberry Banana Muffins
- Chocolate Chip Banana Muffins
- Eggless Banana Muffins
Please leave a comment & recipe rating in the comment box below. Thanks!