This bread machine buttermilk bread recipe produces a white bread that is extra soft. It also has the delicious & slightly tangy taste of buttermilk. You will love this easy buttermilk bread recipe because it only uses a few simple ingredients and the bread machine does most of the work (e.g. mixing & kneading)!
More importantly, if your family likes buttermilk baked goods (e.g. buttermilk biscuits or pancakes) then they will love the taste & texture of this soft homemade buttermilk bread.
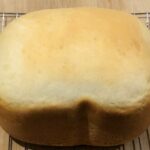
FYI – This bread is baked in your bread machine (and not in your oven).

Recipe Sections
| Recipe RatingFeatured Comment Colleen “The most delicious, soft bread I’ve ever had. It had a very slight sour taste that was great. It slices easily and also makes exceptional toast. I made loaves for my grandchildren and neighbour who all said it was their favourite bread.” |
What is cultured buttermilk? First, it is not a buttery milk. Rather, cultured buttermilk is a type of fermented milk. Buttermilk is sort of like a liquidy yogurt or thick milk. It also has a slightly sour and pleasantly tangy taste. Moreover, the acid in buttermilk breaks down the gluten in bread dough. This makes buttermilk breads more tender & soft than regular breads… and who doesn’t like soft delicious homemade bread.
Sliced Buttermilk Bread

Since this buttermilk recipe is done in a bread machine or bread maker, it is simple & easy to make. This recipe takes me about 5-10 minutes to prepare and clean up (as your bread machine is doing most of the work). FYI – You will find a printable and “pin-able” recipe at the bottom of the page.
FYI – For details on how to make the 1 lb version of this recipe, please visit my 1 lb Bread Machine Buttermilk Bread page.
Ingredients – Bread Machine Buttermilk Bread – 1.5 lb Setting
- 1 1/4 Cups – Buttermilk (warm) – 296 milliliters
- 2 Tablespoons – Unsalted Butter (softened) – 29 grams
- 3 Cups – Bread Flour – 360 grams
- 1 1/2 Tablespoons – White Granulated Sugar – 19 grams
- 1 Teaspoon – Salt – 6 grams
- 1 Teaspoon – Instant Yeast (Bread Machine Yeast) – 3.6 grams – Not active dry yeast
Ingredients – Bread Machine Buttermilk Bread – 2 lb Setting – FYI – This version is closer to a 1.75 lb loaf in order to fit most machines (because this fluffy loaf rises so high). See tips section below for more info.
- 1 1/3 Cups – Buttermilk (warm) – 307 milliliters
- 3 Tablespoons – Unsalted Butter (softened) – 43 grams
- 3 1/2 Cups – Bread Flour – 420 grams
- 1 1/2 Tablespoons – White Granulated Sugar – 19 grams
- 1 1/4 Teaspoons – Salt – 7.5 grams
- 1 1/4 Teaspoons – Instant Yeast (Bread Machine Yeast) – 4.5 grams – Not active dry yeast
Servings – Roughly 12 slices
Equipment Needed – Measuring cup & spoons, flexible spatula, oven mitts, wire cooling rack… and of course, a bread machine!
Recipe Video – Watch How To Make This Bread Machine Recipe
Instructions – Bread Machine Buttermilk Bread
- Settings – 1.5 lb loaf (1.5 lb, light color and basic/white bread) and 2 lb loaf (2 lb, light color and basic/white bread)
- Unplug your bread machine.
- Remove the bread pan from the bread machine (so when you add the ingredients, they can not accidentally spill into the machine).
- Soften the butter in your microwave.
- Pour the buttermilk into the bread pan and then add the other ingredients. Place the bread machine yeast in last and the yeast should not touch the liquid (until the bread machine is turned on and the ingredients start to be mixed together by the bread machine). Put the bread pan with the ingredients back into unplugged bread machine.
- Plug in the bread machine. Enter the correct settings (1.5 lb or 2 lb, light color & basic/white bread) and press the “start” button.
- When the bread machine has finished baking the bread, unplug the bread machine.
- Take the bread pan out of the bread machine.
- Remove the bread from the bread pan and place it on a cooling rack. Use oven mitts when removing the bread pan from the bread machine because it will be very hot! Let the bread cool down on the cooling rack for at least 1-2 hours.
- After removing the bread, don’t forget to remove the mixing paddle if it is stuck in the bread. Use oven mitts as the mixing paddle will be very hot coming out of the bread machine. Or wait until the bread is completely cooled and then remove the mixing paddle.
- Please read the tips section below for extra information on how to make this recipe successfully.
- You also can watch my recipe video to “see” how to perform each recipe step.
If you liked this recipe, please leave a comment below & give us a 5 star rating. Jump to comment section
📌 Save this recipe – Bookmark or pin it
| ❤️Love bread machine recipes? Then subscribe to my Bread Dad newsletter |
Key Ingredient – Buttermilk

Tips – Buttermilk Bread Machine Recipe
- The tips below are for buttermilk and bread machine “novices”. Hopefully, these tips will help you to maximize the success of your bread making!
- Click on this “print recipe” link if you want to print out this recipe. It includes all of the recipe’s ingredients and instructions. However, the recipe print function does not include my tips section. Please read the tips section in order to avoid common recipe problems.
- If you would rather “see” how this recipe is made, please watch the step-by-step recipe video on this page. It is a short & simple video that shows you the steps & ingredients involved in making this recipe and what the bread looks like when it is finished.
- This recipe is part of Bread Dad’s series on easy Bread Machine Recipes such as banana bread, multigrain bread, bagels and French bread.
- This bread machine recipe produces a very soft white bread with a very mild buttermilk taste. In my non-scientific opinion, this buttermilk bread also seems slightly moister than many bread machine breads. Buttermilk bread is one of my favorite white breads!
- Buttermilk bread is perfect as toast, sandwich bread or even as a side dish to dip into soup, stew, etc. I love using buttermilk bread in order to make a delicious ham & cheese sandwich (with mayo & a little wasabi) for lunch.
- As I said above, buttermilk “tenderizes” bread dough by breaking down the gluten in the dough. I don’t know the science behind this action but it results in a softer bread than most bread machine breads.
- Optional – If you would like to make buttermilk bread without the bread machine mixing “paddle” hole and bread machine “block” shape, you should try my oven-baked Buttermilk Bread Recipe. You make the dough in your bread machine and then finish the bread in an oven. It is the oven version of the recipe on this page.
- You should make my 1.5 lb version FIRST (before making the 2 lb version) until you have a better idea of what your machine can manage. Some bread machines with a 2 lb capacity have lots of extra capacity in their bread pans whereas other 2 lb machines have very little extra capacity. Unfortunately, the height of loaves can vary due to incorrect ingredient measurements, the heat of the kitchen, different flours with different gluten levels, different bread pan sizes & shapes, etc. Therefore, it is always safest to start with the 1.5 lb recipe even if you have a machine with a supposed 2 lb capacity. You will be able to see how much of your bread pan is filled by a 1.5 lb loaf and then determine if your bread pan can handle a larger 2lb loaf.
- I have also added a page with bread machine pan sizes. This should help you to determine if your machine is capable of handling Bread Dad’s 1 lb, 1.5 lb or 2 lb recipes.
- For details on how to make the 1 lb version of my buttermilk bread recipe, please visit my 1 lb Bread Machine Buttermilk Bread page. My 1 lb recipes are for small compact bread machines (and not larger 2 lb capacity bread machines).
- You can usually find buttermilk in the dairy sections of most large supermarkets in the US. However, buttermilk is not as popular as regular milk, soy milk, oat milk, almond milk, etc. Therefore, you might have to do a little searching in the diary section.
- In addition, most of the buttermilks sold in supermarkets are “cultured” low fat buttermilks (versus higher fat old fashioned whole buttermilk). Thanks Dan for pointing out this issue!!!
- This recipe is based on using the cultured buttermilk sold in most supermarkets (vs old fashioned whole buttermilk which is difficult to find).
- Make sure the buttermilk is well shaken in the carton before you add it to the bread pan. This prevents the buttermilk from being too watery & lacking some buttermilk flavor (or a thick mass if you are near the bottom of the carton).
- Do NOT use cold buttermilk because that will inhibit the growth of the yeast. The buttermilk should be warm (but not too hot). If you use cold buttermilk, your bread may have trouble rising properly.
- The ideal temperature for liquid ingredients used when making bread machine bread is around 100 to 110 F.
- You can also try to make your own buttermilk with some dried buttermilk powder. Check out my buttermilk powder page if you need more information about the advantages of buttermilk powder or if you need to buy some buttermilk powder.
- To make 1 1/4 cups of liquid buttermilk, you need to combine 5 tablespoons of buttermilk powder with 1 1/4 cup water.
- To make 1 1/3 cups of liquid buttermilk, you need to combine 5 tablespoons plus 1 teaspoon of buttermilk powder with 1 1/3 cup water.
- However, check your buttermilk powder package for the most accurate reconstitution ratio as it can vary by manufacturer.
- Stir the buttermilk powder and water together until they are completely mixed. The buttermilk powder should dissolve almost completely into the water.
- I find that warm water helps the buttermilk powder to dissolve more easily. However, check the manufacturer’s instructions for what works best with your specific brand of buttermilk powder. FYI – When I use cold water, I find that the buttermilk powder is harder to combine and I often have lots of powder “clumps” in the liquid.
- Some of my visitors like to make a homemade version of buttermilk. Thanks Paula for this tip!! It involves combining a little bit of lemon juice or vinegar with dairy milk.
- FYI – To make this type of buttermilk, you add 1 tablespoon of food grade vinegar or lemon juice to a measuring cup and then add enough dairy milk to the measuring cup until the combined amount of vinegar/lemon juice & milk equals 1 cup. Stir the ingredients together in the measuring cup & then let the ingredients in the cup sit for 5 minutes before using.
- I haven’t tried this but the “homemade” buttermilk method also supposedly works with non-dairy milks such as soy milk. Let me know in the comments section if you made non-dairy buttermilk successfully with this method.
- For the best/strongest flavor, you should use FRESH buttermilk (e.g. liquid buttermilk in a carton). Fresh buttermilk has more “tangy” buttermilk flavor versus buttermilk made from buttermilk powder (which tastes much milder).
- Visitors – Do you prefer to use fresh buttermilk (from carton), buttermilk powder or homemade “buttermilk” (milk & vinegar/lemon juice) when making your buttermilk bread & baked goods? Please post your buttermilk tips & suggestions in the comment section below.
- Optional – You can also easily tweak this recipe in order to create a buttermilk herb bread. Just pour in 1 teaspoon of your family’s favorite herb (e.g. dried rosemary or Italian seasoning) when adding the dry ingredients to the bread pan.
- Optional – For a little extra flavor & aroma, you can add 2 or 3 tablespoons of dried onion flakes. I prefer to use dehydrated onions because they do not throw off the liquid-to-dry ingredients ratio of the recipe. If you use chopped up fresh onions, you might be adding too much moisture.
- Visitors – What do you like to add to your buttermilk bread to make it special or unique? Herbs? Chopped nuts? Seeds? Dried fruit? Please post your buttermilk bread variations & tips in the comment section below.
- Visitor variations – Mary Ann said “Each bite is Heavenly and the only thing I added was minced onion and dill weed” and Shirley experiments with “onions and herbs for variety”.
- Always use FRESH ingredients (e.g. bread flour and yeast) for the best results. Ingredients that have been sitting in the pantry for months can become stale or pick up weird smells & flavors.
- Try to keep your ingredients (e.g. flour) in airtight food containers in order to extend their shelf life. Airtight containers protect ingredients from moisture (in the air), pests, dust, etc.
- Flour (if stored in an open bag and not in an airtight container) can absorb a lot of moisture from the air. This extra moisture throws off recipes and can lead to bread collapses, etc.
- This recipe will NOT work with gluten free flour. Gluten free flour differs significantly versus flours with gluten and requires you to use recipes specifically designed for the use of gluten free flour. If you use gluten free flour in this recipe, you are likely to have a baking disaster.
- If you can’t find buttermilk, you might like to try my recipes for Extra Soft Bread Machine Bread or my oven-baked Greek Yogurt Bread. They use Greek yogurt (instead of buttermilk) to tenderize the bread. Greek yogurt also tends to be a little easier to find in the supermarket (versus buttermilk).
- This bread machine buttermilk recipe uses bread machine yeast (instant yeast) and NOT active dry yeast.
- Active dry yeast is different from instant yeast & bread machine yeast. Instant yeast & bread machine yeast are added directly to the recipe’s ingredients (no prior activation needed). In contrast, with active dry yeast, you need to spend roughly 10 minutes “proofing” (activating) the yeast with a liquid & sugar.
- If you add active dry yeast (instead of bread machine/instant yeast), your bread machine bread may have problems rising properly. Active dry yeast does not activate instantly (unlike bread machine yeast) and thus has less time for rising.
- If you have not made bread in a long time, please buy some NEW bread machine yeast or instant yeast before making your bread. Old yeast can die or lose its potency and this will lead to bread that does not rise properly. Yeast is not likely to be viable if it has been sitting in your pantry for years.
- Once you have opened the container that contains the yeast, the yeast will last longer if you store the bottle in the refrigerator or freezer. Just make sure the bottle is sealed tight (as yeast will deteriorate quickly if exposed to air, moisture and/or heat).
- I would recommend NOT reducing the salt in this recipe. You generally want to keep the salt-to-yeast ratio at a 1:1 basis in most bread recipes (on a teaspoon to teaspoon basis and NOT on a gram to gram basis). The salt moderates the growth of the yeast. If you cut the salt (and disrupt this 1:1 ratio), the yeast will grow faster than expected. In turn, this leads to more bread collapses (because the yeast rises too high and then craters in the middle) and/or results in “slack” less manageable dough. In addition, less salt will impact the flavor and browning of the bread.
- FYI – The 2 lb version of this recipe is really a 1.75 lb version. I tried making a 2 lb version (with the typical 4 cups of bread flour) but the buttermilk makes the 2 lb bread too fluffy! A 2 lb version rises too high in the bread pan and hits the top of a standard mid-sized bread machine (that is designed for 1.5 lb & 2 lb loaves). Therefore, I created a slightly smaller 1.75 lb version to avoid this problem. The 1.75 lb version tastes great, is nice & soft and is the size of a “normal” (non-buttermilk bread) 2 lb bread loaf. More importantly, it doesn’t hit the top of the bread machine! FYI – Even though the weight is close to 1.75 lbs, you should use the 2 lb bread machine setting when making this version.
- According to Wikipedia, “Cultured buttermilk was first commercially introduced in the United States in the 1920s. Commercially available cultured buttermilk is milk that has been pasteurized and homogenized, and then inoculated with a culture of Lactococcus lactis or Lactobacillus bulgaricus plus Leuconostoc citrovorum to simulate the naturally occurring bacteria in the old-fashioned product. The tartness of cultured buttermilk is primarily due to lactic acid produced by lactic acid bacteria while fermenting lactose, the primary sugar in milk.”
- In contrast, Wikipedia states the following about old fashioned whole buttermilk “Originally, buttermilk referred to the liquid left over from churning butter from cultured or fermented cream. Traditionally, before the advent of homogenization, the milk was left to sit for a period of time to allow the cream and milk to separate. During this time, naturally occurring lactic acid-producing bacteria in the milk fermented it.
- If you would like to read my review of the bread machines that I own & use to create my bread machine recipes, please visit my Best Bread Machines page. It covers bread machines such as Hamilton Beach, KBS and Zojirushi. The page provides my thoughts on the machines’ strengths and weaknesses.
- This recipe does not have a lot of extra butter because I want a buttermilk bread that tastes of buttermilk.
- I may be crazy but buttermilk bread seems to get even better on the second day after baking (e.g. softer & moister).
- If you like buttermilk, you might also like to try out my Buttermilk Banana Bread Recipe. Or check out my Bread Machine Hamburger Buns recipe. It is also made with buttermilk (in order to make super soft hamburger buns).
- However, if you are looking to make a buttery white bread versus a buttermilk white bread, you should try my popular buttery Bread Machine White Bread recipe.
- Don’t lift the bread machine cover to “peek” at the dough during the baking stage. This will let out heat & impact the baking process.
- Sometimes a little flour will stick to the sides of the bread pan during the mixing process. Therefore, during the “pause” between the first and second mixing cycle (when the mixing paddle has fully stopped), I like to scrape the flour from the inside of the bread pan with a soft flexible spatula. Of course, always wear oven gloves when dealing with a bread machine & don’t put your hands inside the machine.
- You should let your bread cool down for 1 to 2 hours on the wire cooling rack before you cut any slices (or the slices will be “gummy” and not taste as good as expected). Excess interior moisture is released (via steam) during the cooldown period.
- If you have a problem with a “basic” bread machine recipe, please make sure that you are following the recipe exactly (e.g. using the correct bread machine settings), using the correct amount of an ingredient (e.g. don’t eyeball the measurements versus using a measurement cup or accidentally add a tablespoon when a teaspoon is called for), using the correct ingredients (e.g. bread machine yeast versus regular yeast or bread flour versus all purpose flour), etc. Please don’t “wing” things with recipes.
- If you start substituting ingredients (e.g. different types of flour), you are experimenting and should not expect similar results to the recipe shown above. Experimenting can be fun. However, you should expect some successes but more potential disappointments when you start to experiment with recipes. For example, if you substitute whole wheat flour for bread flour, you will probably experience a problem (as whole wheat flour doesn’t rise nearly as well as bread flour). Moreover, whole wheat flour has a totally different flavor.
- Be aware that some bread recipes may differ slightly between different types of bread machines & bread makers. Therefore, please read your bread machine manufacturer’s instructions for basic bread recipes (e.g. white bread or whole wheat bread) as these are more likely to work on your individual bread machine.
- Having trouble with bread collapses & misshapen bread tops? Make sure to read Bread Dad’s article on Why Did My Bread Machine Bread Collapse. It has reasons for and solutions to potential bread collapses.
- If your dough is having trouble rising properly, you should check out my How To Test Yeast page. This yeast test will show you if your yeast is alive & active or dead/expired. It will save you from a few bread disasters!
- For information on other possible errors, please visit my Common Bread Machine Mistakes page.
- You can also use this homemade bread to make one of Bread Dad’s hot & toasty Grilled Cheese & Panini Sandwich Recipes (such as air fryer grilled cheese or ham & cheese paninis).
- My recipes are based on US ingredient measurements (e.g. US cups & tablespoons). However, as a courtesy to our European visitors, I have also included some very ROUGH European equivalents (e.g. grams & milliliters). Since I rarely use European measurements when baking, please let me know in the comment section below if any of the European ingredient measurements need to be changed (e.g. for XYZ ingredient, milliliters are more commonly used versus the grams information listed in the recipe).
- Always wear oven mitts/gloves when dealing with a bread machine. The bread pan and the rest of the bread machine can get very hot during the baking process. This means that the bread pan and bread machine is likely to be very hot when you attempt to remove a baked good from the bread machine and/or bread pan.
- For more easy bread ideas, you might like to explore Bread Dad’s Bread Machine Recipes or Homemade Bread Recipes sections.
If you liked this recipe, please leave a comment below & give us a 5 star rating. Jump to comment section
| 📌Follow Bread Dad on Facebook for recipes & baking tips! |
Want More Recipes? Try These Next
- Bread Machine Recipes – 90+ recipes for banana bread, sourdough bread, pizza dough, cinnamon raisin bread, etc.
- Bread Recipes – French bread, buttermilk bread, bagels, Italian bread, etc.
- Banana Bread Recipes – 60+ recipes for banana nut bread, eggless banana bread, chocolate chip banana bread, etc.
- Quick Bread Recipes – Recipes using baking soda such as pumpkin bread, cranberry bread, etc.
| Made this recipe today? Snap a photo & show it off on my Facebook page! |
Reference Sources
- Wikipedia, Bread Machine
- Wikipedia, Buttermilk
- Wikipedia, Flour
Bread Machine Buttermilk Bread + Recipe Video
Ingredients
Ingredients – Bread Machine Buttermilk Bread – 1.5 lb Setting
- 1 1/4 Cups Buttermilk (warm) – 296 grams
- 2 Tablespoons Unsalted Butter (softened) – 29 grams
- 3 Cups Bread Flour – 360 grams
- 1 1/2 Tablespoon White Granulated Sugar – 19 grams
- 1 Teaspoon Salt – 6 grams
- 1 Teaspoon Instant Yeast (Bread Machine Yeast) – 3.6 grams – Not active dry yeast
Ingredients – Bread Machine Buttermilk Bread – 2 lb Setting
- 1 1/3 Cups Buttermilk (warm) – 307 milliliters
- 3 Tablespoons Unsalted Butter (softened) – 43 grams
- 3 1/2 Cups Bread Flour – 420 grams
- 1 1/2 Tablespoons White Granulated Sugar – 19 grams
- 1 1/4 Teaspoons Salt – 7.5 grams
- 1 1/4 Teaspoons Instant Yeast (Bread Machine Yeast) – 4.5 grams – Not active dry yeast
Instructions
- Settings – 1.5 lb loaf (1.5 lb, light color and basic/white bread) and 2 lb loaf (2 lb, light color and basic/white bread)
- Unplug your bread machine.
- Remove the bread pan from the bread machine (so when you add the ingredients, they can not accidentally spill into the machine).
- Soften the butter in your microwave.
- Pour the buttermilk into the bread pan and then add the other ingredients. Place the bread machine yeast in last and the yeast should not touch the liquid (until the bread machine is turned on and the ingredients start to be mixed together by the bread machine). Put the bread pan with the ingredients back into unplugged bread machine.
- Plug in the bread machine. Enter the correct settings (1.5 lb or 2lb, light color & basic/white bread) and press the "start" button.
- When the bread machine has finished baking the bread, unplug the bread machine.
- Take the bread pan out of the bread machine.
- Remove the bread from the bread pan and place it on a cooling rack. Use oven mitts when removing the bread pan from the bread machine because it will be very hot! Let the bread cool down on the cooling rack for at least 1-2 hours.
- After removing the bread, don’t forget to remove the mixing paddle if it is stuck in the bread. Use oven mitts as the mixing paddle will be very hot coming out of the bread machine. Or wait until the bread is completely cooled and then remove the mixing paddle.
Notes
Nutrition
Related Recipes
- Bread Machine Oatmeal Bread
- Bread Machine White Bread
- Buttermilk Bread – Oven baked
- Greek Yogurt Bread – Oven baked
- Sour Cream Bread – Oven baked
- White Bread – Oven baked
Please leave a comment & recipe rating in the comment box below. Thanks!