This oatmeal bread machine recipe creates a soft, hearty sandwich bread. It also adds wholesome oats to your family’s diet. Since you are using a bread machine, this oatmeal bread is very easy to make. The bread machine does most of the hard work such as mixing & kneading. No oven required! Plus, on this page, you will find a step-by-step video to help you make this easy bread machine recipe.
Bread Machine Oatmeal Bread – Old Fashioned Goodness!

Recipe Sections
| Recipe RatingFeatured Comment Jess “I’m a newbie when it comes to bread machines (having inherited a bread maker without a manual) and I really appreciate quality recipes. I’ve made this recipe twice now and both loaves have come out perfect! The instructions are super clear and easy and I followed it exactly. This is a loaf (and website) that I’ll definitely be coming back to.” |
Because this bread machine recipe does not contain any overpowering spices, this classic oatmeal bread can be used for a huge variety of sandwiches such as ham & cheese sandwiches, chicken salad sandwiches, roast beef sandwiches, etc.
Oatmeal tastes great and is supposed to have many health benefits. According to WebMD, “Oatmeal’s most enduring claim to fame is its proven ability to curb bad (LDL) cholesterol. Chalk that up to a type of soluble fiber called beta glucan… The fiber in oatmeal also helps you feel full and eat less later on during the day. Fiber also eases constipation and helps control blood sugars”. This is definitely the type of sandwich bread to make for your family if you are trying to add some good old fashioned natural fiber into their diet.
Slices of Bread Machine Oatmeal Bread

FYI – For details on how to make the 1 lb version of this recipe, please visit my 1 lb Bread Machine Oatmeal Bread page.
Ingredients – Bread Machine Oatmeal Bread Recipe – 1.5 lb Loaf
- 1 1/8 Cups – Milk (warm) – 259 milliliters – 1 1/8 cups of milk is equivalent to 1 cup and 2 tablespoons of milk
- 3 Tablespoons – Unsalted Butter (sliced & softened) – 43 grams
- 2 1/4 Cups – Bread Flour – 270 grams
- 3/4 Cup – Old Fashioned Oatmeal (oat flakes) – 68 grams – Do not pre-moisten oats. Use DRY oat flakes.
- 1/4 Cup – Light Brown Sugar (packed) – 54 grams – If you prefer non-sweet oatmeal breads, you should use only 1 1/2 tablespoons of brown sugar.
- 1 Teaspoon – Salt – 6 grams
- 1 Teaspoon – Bread Machine Yeast – 3.6 grams – Not active dry yeast
Ingredients – Bread Machine Oatmeal Bread Recipe – 2 lb Loaf
- 1 1/2 Cups – Milk (warm) – 345 milliliters
- 4 Tablespoons – Unsalted Butter (sliced & softened) – 57 grams
- 3 Cups – Bread Flour – 360 grams
- 1 Cup – Old Fashioned Oatmeal (oat flakes) – 90 grams – Do not pre-moisten oats. Use DRY oat flakes.
- 1/3 Cup – Light Brown Sugar (packed) – 72 grams – If you prefer non-sweet oatmeal breads, you should use only 2 tablespoons of brown sugar.
- 1 1/2 Teaspoons – Salt – 9 grams
- 1 1/2 Teaspoons – Bread Machine Yeast – 5.4 grams – Not active dry yeast
Servings – Roughly 12 slices
Equipment Needed – Measuring cup & spoons, silicone spatula, oven mitts, cooling rack and a bread machine.
Need any of these tools? Check out my bread making equipment page.
Recipe Video – How To Make Bread Machine Oatmeal Bread
FYI – A short ad might play in front of this recipe video
Instructions – Bread Machine Oatmeal Bread Recipe
- Bread machine settings – 1.5 or 2 pound loaf, light color and “basic/white” bread setting
- Unplug the bread machine & then remove the bread pan.
- Add all ingredients starting with the milk into the bread machine “bucket” (loaf pan). Make sure the yeast is last and does not touch the milk or salt. Some people like to make a small “divot” on top of the flour in order to hold the yeast in one spot before the machine starts.
- Place the bread pan (with ingredients) back into the bread machine.
- Plug in bread machine. Enter the correct settings (for either 1.5 lb or 2 lb loaf version) and press the “start” button.
- Optional – After the bread machine has finished kneading and before the baking cycle commences, sprinkle some old fashioned oatmeal flakes on top of the bread dough.
- When the bread machine has finished baking the bread, unplug the bread machine. Remove the bread and place it on a cooling rack. Use oven mitts when removing the bread machine container (bread loaf pan) as it will be very hot!
- In our Sunbeam bread machine, the baking takes about 3 hours for a 2 pound bread loaf (and 2:53 hours for a 1.5 lb bread loaf) at the light color & basic bread settings. However, some machines can differ and you don’t want to be away from home when the bread machine “finished” alarm goes off! Your bread machine should show you the length of the baking time after you have entered the settings into the machine. This will allow you to know when to be in the kitchen in order to remove the bread.
- Before using your bread machine, you should read the bread machine manufacturer’s instructions in order to use the bread machine effectively and safely.
- Please read the tips section below for extra information on how to make this recipe successfully.
- You also can watch my recipe video to “see” how to perform each recipe step.
If you liked this recipe, please leave a comment & 5 star rating below. Jump to comment section
📌 Save this recipe – Bookmark or pin it
| ❤️Love bread machine recipes? Then subscribe to my Bread Dad newsletter |
1 lb Version – For Small Compact Bread Machines

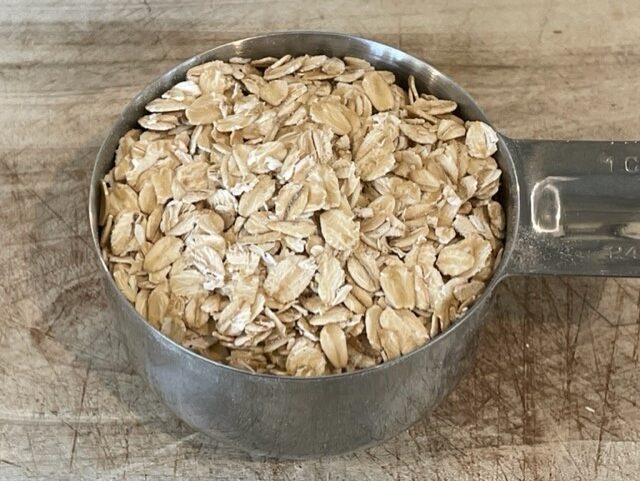
Key Ingredient – Old Fashioned Oat Flakes
Tips – Bread Machine Oatmeal Bread Recipe
- The tips below are designed to help bread machine “novices” and those who haven’t touched their bread machine in years.
- Click on this “print recipe” link if you want to print out this recipe. It includes all of the recipe’s ingredients and instructions. However, the recipe print function does not include my tips section. Please read the tips section in order to avoid common recipe problems.
- If you would rather “see” how this recipe is made, please watch the step-by-step recipe video on this page. It is a short & simple video that shows you how to make this recipe.
- This recipe is part of Bread Dad’s series on easy Bread Machine Recipes such as banana bread, buttery white bread, French bread and sourdough bread.
- For bread machines with a loaf capacity greater than 1 lb, you should make the 1.5 lb version first. Some bread machines with a supposed 2lb loaf capacity are smaller than advertised. This “2 lb capacity” is based on the manufacturer’s smaller internal recipes and not on many standard online recipes. I would recommend seeing how the 1.5 lb version works in your bread machine before attempting the 2 lb version. This could save you from the 2 lb version overflowing your bread pan (if your machine has problems with standard 2 lb online recipes).
- This recipe is NOT for 1 lb capacity bread machines. Please check the capacity of your bread machine before making this recipe. This recipe helps you to create 1.5 lb and 2 lb bread loaves. If you have a small bread machine (e.g. a bread machine that has only a capacity for 1 lb breads), you will be unable to make this recipe. The loaf will be too large for your machine and overflow the bread pan (and the top is likely to collapse).
- FYI – If you own a small compact bread machine, you should use my 1 lb Bread Machine Oatmeal Bread recipe. It is the 1 lb version of the recipe found on this page.
- I have also added a page to Bread Dad with the Bread Machine Pan Sizes for a number of popular bread machines. This should help you to determine if your machine is capable of handling Bread Dad’s 1 lb, 1.5 lb or 2 lb recipes. For example, some bread machines with a “2 lb loaf capacity” are better suited for my 1.5 lb recipes (as they can’t handle my fluffy 2 lb recipes) and some are better with my 2 lb recipes (as their pans have lots of extra space).
- You need to use DRY oat flakes in order to make this bread (don’t use already cooked/boiled oatmeal). Boiled oatmeal has varying amounts of moisture and will mess up the recipe. If you use boiled oatmeal, the bread will have too much liquid (versus what is called for in the recipe) and come out undercooked.
- Do not pre-moisten the oat flakes before adding them to the bread pan.
- This recipe does not use super “fluffed” flour. It is based on the slightly compressed flour found in most flour packages.
- The dough may look a little wetter than usual during the first mixing/kneading cycle of your machine as it takes some time for the dry oats to absorb the liquid in the recipe. By the second & final mixing/kneading cycle (before the baking cycle commences), the dough should look more “normal” as the oats will have absorbed the moisture in the dough.
- To make this bread look more “authentic”, I like to sprinkle some old fashioned oatmeal flakes on the top of the dough after the bread machine has finished its final kneading cycle. I use old fashioned oatmeal (versus instant oatmeal) in order to get large oatmeal flakes. Of course, for safety, I wear oven mitts & don’t put my hands inside the bread machine.
- However, it is hard to get this done correctly with only a bread machine. It is much easier with an oven-baked bread machine oatmeal bread. For example, you can make the oatmeal dough in your bread machine and then bake it in the oven. Just before you place the bread pan in the oven, you can brush an egg wash on the top of the dough and then sprinkle some oat flakes on the sticky egg wash (in order to achieve a nice “oaty” top to the loaf).
- If this bread maker oatmeal bread is too plain for your family, you can add some dried fruit such as raisins, dried cranberries, dried blueberries, etc.
- This oatmeal bread recipe uses plain “old fashioned” oat flakes (oatmeal) because they are less processed & have larger flakes than “one minute” or instant oats. However, you can use unflavored one minute/instant oats (oatmeal) as a substitute if you are out of old fashioned oat flakes.
- FYI – I usually use Quaker Oats Old Fashioned Oats (oat flakes) to make this recipe. However, there are also many lower cost supermarket old fashioned oat flakes brands too.
- Visitors – What do you like to add when making this bread? Buttermilk? Chopped nuts? Dried cranberries? Something else? Please leave your ingredient thoughts & suggestions in the comment box below.
- Do not use cold milk. The main problem with using regular milk is that people tend to use cold refrigerated milk and this can slow the yeast growth. Try to use warm milk (or instant powdered milk mixed into warm water). However, you should also be aware that the milk/water should not be too hot because very hot milk/water can kill the yeast.
- Optional – If you are out of dairy milk, you can replace it with soy milk, oat milk, water, etc. I use whole milk because it adds a little flavor to the bread but you can use a milk substitute that is best for your family.
- Optional – If you want to create an even softer oatmeal bread, use buttermilk instead of the milk called for in the recipe. Buttermilk is acidic and this helps to “tenderize” the gluten in the flour. Buttermilk is a great way to soften homemade bread.
- Optional – If you do not have butter, you can replace it with a neutral tasting vegetable oil (e.g. canola oil or corn oil) on a 1 to 1 basis (e.g. replace 3 tablespoons of butter with 3 tablespoons of oil). However, you will be giving up the buttery flavor.
- Do NOT confuse the 1.5 lb & 2 lb ingredient amounts and bread machine settings when making your bread (e.g. accidentally use some of the 2 lb amounts when making the 1.5 lb loaf version). I have… cough, cough… made this mistake before!
- This recipe uses bread flour. Not whole wheat flour. If you use whole wheat flour, the bread is likely to have problems rising properly.
- Do not replace the bread flour from the recipe with oat flour. Due to its higher gluten, the bread flour in this recipe improves the structure (airiness) of the bread. In contrast, oat flour has little or no gluten. If you replace bread flour with oat flour, you will have a much denser bread. Due to the low amount of gluten, an oat flour bread has a hard time rising properly.
- Always use FRESH ingredients (e.g. bread flour and yeast) for the best results. Ingredients that have been sitting in the pantry for months can become stale or pick up weird smells & flavors.
- Try to keep your ingredients (e.g. flour) in airtight food containers in order to extend their shelf life. Airtight containers protect ingredients from moisture (in the air), pests, dust, etc.
- Old flour (when not stored in an airtight container) can absorb a lot of moisture from the air. This extra moisture throws off recipes and can lead to bread collapses, etc.
- This recipe will NOT work with gluten free flour. Gluten free flour differs significantly versus flours with gluten and requires you to use recipes specifically designed for the use of gluten free flour. If you use gluten free flour in this recipe, you are likely to have a baking disaster.
- This recipe uses bread machine yeast (instant yeast) and NOT active dry yeast.
- When adding the yeast, it should be placed in a position that is separate from the salt (e.g. placed on opposite sides of the bread pan). Close contact with salt can kill or slow the growth of the yeast. I like to make a small “divot” on top of the flour in order to hold the yeast (separate from the salt) before the bread machine starts mixing the ingredients.
- I would recommend NOT reducing the salt in this recipe. You generally want to keep the salt-to-yeast ratio at a 1:1 basis in most bread recipes (1:1 based on teaspoons to teaspoons and NOT grams to grams). The salt moderates the growth of the yeast. If you cut the salt (and disrupt this 1:1 ratio), the yeast will grow faster than expected. In turn, this leads to more bread collapses (because the yeast rises too high and then craters in the middle) and/or results in “slack” less manageable dough. In addition, less salt will impact the flavor and browning of the bread.
- Optional – Try my oven-baked Oatmeal Bread Recipe if you want to make the oatmeal dough with your bread machine and finish it in your oven in order to achieve the classic bread loaf shape (vs the bread machine “block” shape) and avoid any bread machine mixing paddle holes in your loaf. It is the oven version of the recipe on this page.
- Optional – Or check out my Honey Oat Bread if you want to use honey instead of processed sugar. Or for an oatmeal bread made with molasses, check out my Oatmeal Molasses Bread.
- Once you have mastered basic bread machine bread recipes (like this bread), you might like to try some more advanced bread machine bread recipes (e.g. French bread or Italian bread). In these recipes, the bread machine will still do the hard work of kneading the dough but you will have to shape the bread by hand.
- According to Wikipedia, “In a 100-gram (3 1⁄2-ounce) serving, oats provide 1,630 kilojoules (389 kilocalories) of food energy and are a rich source (20% or more of the Daily Value, DV) of protein (34% DV), dietary fiber (44% DV), several B vitamins and numerous dietary minerals”.
- Having trouble with bread collapses & misshapen bread tops? Make sure to read Bread Dad’s article on Bread Machine Bread Collapses. It has reasons and solutions to potential bread collapses.
- If your bread comes out too dense, it is likely due to one of the following reasons; You are using old or stale yeast, using a cold refrigerator temperature liquid (which slows yeast growth), baking in a cold winter temperature kitchen (yeast likes kitchen temps of 75-80 degree F), using all purpose flour (versus bread flour as called for in the recipe), placing salt on top of or next to the yeast (salt kills yeast so it must be placed away from the yeast in the bread pan), etc. For more reasons, you should visit Bread Dad’s Why Is My Bread Machine Bread So Dense? page.
- For information on other possible errors, please visit my Common Bread Machine Mistakes page.
- If you start substituting ingredients (e.g. using different types of flour not called for in the recipe), you are experimenting and should not expect similar results to the recipe shown above. Experimenting can be fun. However, you should expect some successes but more potential disappointments when you start to experiment with recipes. For example, if you substitute whole wheat flour for the bread flour, you will probably experience a problem (as whole wheat flour doesn’t rise nearly as well as bread flour). Moreover, whole wheat flour has a totally different flavor.
- If you have a problem with a bread machine recipe, please make sure that you are following the recipe exactly (e.g. using the correct bread machine settings), you are using the correct amount of an ingredient (e.g. don’t eyeball the measurements versus using a measurement cup or accidentally add a teaspoon when a tablespoon is called for), you are using the correct ingredients (e.g. bread machine yeast versus regular yeast or bread flour versus all purpose flour), etc. Please don’t “wing” things with recipes.
- If you would like to read my review of the bread machines that I own & use to create my bread machine recipes, please visit my Best Bread Machines page. It covers bread machines such as Hamilton Beach, KBS and Zojirushi. The page points out their strengths and weaknesses.
- Be aware that some bread recipes may differ slightly between different types of bread machines. Therefore, please read your bread machine manufacturer’s instructions for basic bread recipes (e.g. white bread or whole wheat bread) as these are more likely to work on your individual bread machine.
- If you haven’t used your bread machine in a long time, please buy some NEW bread machine yeast before making your bread. Old yeast can die or lose its potency and this will lead to bread that does not rise properly. Bread machine yeast may not be viable if it has been sitting in your pantry for years.
- FYI – Bread machine yeast loses its potency over time. Generally, bread machine yeast lasts for only 3-4 months after you have opened the bottle. However, if the yeast is exposed to air & moisture (e.g. the bottle not sealed tight) or exposed to higher temperatures, the yeast will expire even more quickly.
- Once you have opened the bottle that contains the bread machine yeast, the yeast will last longer if you store the bottle in the refrigerator or freezer. Just make sure the bottle is sealed tight (as yeast will deteriorate quickly if exposed to air, moisture and/or heat).
- Bread machine yeast in a bottle that has never been opened should last until the bottle’s “Best If Used By” date… but only if the bottle has been stored properly (e.g. in a refrigerator, freezer or in a dark, dry & cool spot in the pantry) and the bottle remains unopened.
- Kitchen humidity can impact a recipe. A winter kitchen tends to be drier due to your heating system drying out the air. In contrast, a kitchen in the summer can be much more humid. This change in humidity impacts baking as flour can soak up humidity from the air. Therefore, you might have to add 1-2 teaspoons of liquid in the winter if the dough is looking too dry. Or you might have to add 1-2 teaspoons of flour in the summer if the dough is looking too wet. If your kitchen is very dry or humid, you might have to add even a little more (but start with 1 teaspoon at a time until you achieve the right consistency). Of course, excessive kitchen humidity or dryness can impact a recipe at any time during the year (not just in the summer & winter)!
- Moreover, you should read this very useful comment from Pete (one of our amazing visitors) – “Newcomers to bread machines – especially those who like to hover over the loaf – have to be careful with this recipe. The 100% hydration level is necessitated by the dry oats. It takes a while for the oats to absorb the milk so it may be well into the first kneading cycle before the dough ball begins to “look” like that of a lower-hydration recipe. So resist the temptation to add more flour.”
- Humidity is also one of the reasons that people should store flour in an airtight container (if they have already opened the flour package). Flour (not in airtight containers) can pick up extra moisture from the air while sitting in the pantry. This can throw off recipes, spoil the flavor, degrade the flour’s shelf life, etc.
- You can also use this homemade bread to make one of Bread Dad’s hot & toasty Grilled Cheese Sandwich & Panini Recipes.
- My recipes are based on US ingredient measurements (e.g. US cups & tablespoons). However, as a courtesy to our European visitors, I have also included some very ROUGH European equivalents (e.g. grams & milliliters). Since I rarely use European measurements when baking, please let me know in the comment section below if any of the European ingredient measurements need to be changed (e.g. for XYZ ingredient, milliliters are more commonly used versus the grams information listed in the recipe).
- Always wear oven mitts/gloves when dealing with a bread machine. The bread pan and the rest of the bread machine can get very hot during the baking process. This means that the bread pan and bread machine is likely to be very hot when you attempt to remove a baked good from the bread machine and/or bread pan.
- If you are new to bread machines and want more simple recipes, you might like to check out my page on Easy Bread Machine Recipes for Beginners.
- For more bread making ideas, please visit Bread Dad’s sections on Bread Machine Recipes and Homemade Bread Recipes.
If you liked this recipe, please leave a comment & 5 star rating below. Jump to comment section
| 📌Follow Bread Dad on Facebook for recipes & baking tips! |
Want More Recipes? Try These Next
- Bread Machine Recipes – 90+ recipes for banana bread, sourdough bread, pizza dough, cinnamon raisin bread, etc.
- Bread Recipes – French bread, buttermilk bread, bagels, Italian bread, etc.
- Banana Bread Recipes – 60+ recipes for banana nut bread, eggless banana bread, chocolate chip banana bread, etc.
- Quick Bread Recipes – Recipes using baking soda such as pumpkin bread, cranberry bread, etc.
| Made this recipe today? Snap a photo & show it off on my Facebook page! |
Oatmeal Bread Questions
Can bread be made from oatmeal?
Oatmeal bread is generally not made completely from oatmeal. It is often a mixture of wheat-based flour (usually bread flour) and oatmeal. Most oatmeal bread recipes use more wheat-based flour than oatmeal (e.g. 3 cups of bread flour and 1 cup of oatmeal). Bakers use more bread flour because it contains gluten protein and this enables the bread to rise during the yeast fermentation process. This helps to create a taller & fluffier bread. In contrast, oat flakes & oatmeal have very little or no gluten and thus do not rise. This inability to rise limits the amount of oatmeal used in many bread recipes. Oatmeal is often added to a bread recipe in order to provide healthy oat fiber.
Is oatmeal bread better?
Oatmeal bread tends to provide more healthy fiber than regular white bread. Other health benefits from oatmeal supposedly include the ability to lower LDL cholesterol (bad cholesterol), reduce constipation (due to the extra fiber), etc. Finally, in my opinion, homemade oatmeal bread tastes far better than boring store packaged white bread.
For more information on the benefits of oatmeal, please read this WebMD article.
Does oatmeal have fiber?
Oatmeal is a good source of soluble fiber. According to the Mayo Clinic, soluble fiber “found in beans, oats, flaxseed and oat bran may help lower total blood cholesterol levels by lowering low-density lipoprotein, or “bad,” cholesterol levels.”. In contrast, whole wheat provides more insoluble fiber. Insoluble fiber doesn’t break down significantly and thus helps everything in the digestive tract to “move along”. This means insoluble fiber is good for issues such as constipation. If you are looking for more insoluble fiber, you should try our bread machine whole wheat bread recipe.
For more on oats & soluble fiber, you should read this Wikipedia article. You can also read this WebMD article called Soluble and Insoluble Fiber: What’s the Difference.
What is the difference between oats and oatmeal?
The difference between oats and oatmeal is the processing. Oats are the unprocessed seeds of a cereal grain plant known as the oat plant or common oat. In contrast, oatmeal is made from processed oats where the oat seeds have been ground, steel-cut or rolled. However, due to marketing purposes, oats and oatmeal are often used interchangeably. You can find different types of oatmeal called instant oats, rolled oats, steel-cut oats, Irish oats, etc. Confusing but if the oats have been processed, the product is an oatmeal (regardless of the branding name).
Can I make bread machine oatmeal bread with all-purpose flour?
You can use all-purpose flour to make bread machine oatmeal bread. However, all-purpose flour doesn’t have as much gluten as bread flour. Gluten helps to trap the carbon dioxide released by the yeast. Therefore, bread flour rises better than all-purpose flour and creates a chewier bread. However, if you are out of bread flour and can’t get to the store, you can use all-purpose flour instead. An oatmeal bread made with all-purpose flour should be a decent substitute… just not as good as an oatmeal bread created with bread flour.
For more on the differences between various types of flour, you should read this Wikipedia article.
Can I make this bread machine oatmeal bread without butter?
Yes, you can make bread machine oatmeal bread without butter. Some people like to make “no butter” breads because they have run out of butter or they are trying to reduce the saturated fat in their diet.
You just need to substitute vegetable oil for the butter in this recipe. They are almost equal substitutes. For example, 1 tablespoon of butter equals 3/4 to 1 tablespoon of vegetable oil (depending on the vegetable oil that you use). In addition, when making no butter oatmeal bread, you might want to consider using a neutral flavored vegetable oil (e.g. corn or canola oil) versus a stronger flavored vegetable oil. However, while the oatmeal bread made with vegetable oil will be okay, it will lack the delicious buttery taste of the recipe above.
If you liked this recipe, please leave a comment & 5 star rating below. Jump to comment section
Reference Sources
- Wikipedia, Bread Machine
- Wikipedia, Oat
- Wikipedia, Oatmeal

Bread Machine Oatmeal Bread – Easy Recipe + Video
Ingredients
Ingredient List for a 1.5 lb Loaf – Oatmeal Bread
- 1 1/8 Cups Milk (warm) – 259 milliliters – 1 1/8 cups of milk is equivalent to 1 cup and 2 tablespoons of milk
- 3 Tablespoons Unsalted Butter (sliced & softened) – 43 grams
- 2 1/4 Cups Bread Flour – 270 grams
- 3/4 Cup Old Fashioned Oatmeal (oat flakes) – 68 grams
- 1/4 Cup Light Brown Sugar (packed) – 54 grams – If you prefer non-sweet oatmeal breads, you should use only 1 1/2 tablespoons of brown sugar.
- 1 Teaspoon Salt – 6 grams
- 1 Teaspoon Bread Machine Yeast – 3.6 grams
Ingredient List for a 2 lb Loaf – Oatmeal Bread
- 1 1/2 Cups Milk (warm) – 345 milliliters
- 4 Tablespoons Unsalted Butter (sliced & softened) – 57 grams
- 3 Cups Bread Flour – 360 grams
- 1 Cup Old Fashioned Oatmeal (oat flakes) – 90 grams
- 1/3 Cup Light Brown Sugar (packed) – 72 grams – If you prefer non-sweet oatmeal breads, you should use only 2 tablespoons of brown sugar.
- 1 1/2 Teaspoons Salt – 9 grams
- 1 1/2 Teaspoons Bread Machine Yeast – 5.4 grams
Instructions
- Bread machine settings – 1.5 or 2 pound loaf, light color and “basic/white” bread setting
- Unplug the bread machine & then remove the bread pan.
- Add all ingredients starting with the milk into the bread machine “bucket” (loaf pan). Make sure the yeast is last and does not touch the milk or salt. Some people like to make a small "divot" on top of the flour in order to hold the yeast in one spot before the machine starts.
- Place the bread pan (with ingredients) back into the bread machine.
- Plug in bread machine. Enter the correct settings (for either 1.5 lb or 2 lb loaf version) and press the "start" button.
- Optional – After the bread machine has finished kneading and before the baking cycle commences, sprinkle some old fashioned oatmeal flakes on top of the bread dough.
- When the bread machine has finished baking the bread, unplug the bread machine. Remove the bread and place it on a cooling rack. Use oven mitts when removing the bread machine container (bread loaf pan) as it will be very hot!
- In our Sunbeam bread machine, the baking takes about 3 hours for a 2 pound bread loaf (and 2:53 hours for a 1.5 lb bread loaf) at the light color & basic bread settings. However, some machines can differ and you don’t want to be away from home when the bread machine “finished” alarm goes off! Your bread machine should show you the length of the baking time after you have entered the settings into the machine. This will allow you to know when to be in the kitchen in order to remove the bread.
- Before using your bread machine, you should read the bread machine manufacturer’s instructions in order to use the bread machine effectively and safely.
Notes
Nutrition
Related Recipes
- Bread Machine White Bread
- Bread Machine Whole Wheat Bread
- Honey Oat Bread – Oven-baked
- Oat Nut Bread – Bread machine & oven recipes
- Oatmeal Bread – Oven baked
- Oatmeal Molasses Bread – Oven baked
Please leave a comment & recipe rating in the comment box below. Thanks!