This bread machine French bread recipe is very easy to make. It only uses a few simple ingredients such as flour, water, salt and yeast. Moreover, my French bread tastes great and you can easily mold it into a beautiful baguette shape.
Your family will be amazed by your baking skills… while you smirk because you made it with the help of a bread machine! This bread recipe can also be a fun family project, especially if you have small children. Have them shape your bread for you. You can always reshape the dough if they create a food monstrosity!
Delicious Bread Machine French Bread (Baguette)

Recipe Sections
| Recipe RatingFeatured Comment Trisha “Bread dad single handedly taught me how to use a bread machine to make the most delicious breads! His recipes are always the go-to in our household This French bread recipe definitely gets the most use, though! It has a perfect crumby crust and hard bottom, and if you want it to be a little softer (more like an Italian loaf vs the French loaf) all you have to do is add a small amount of fat (oil, butter, coconut oil, etc) making it a perfect recipe for basically any bread need.” |
This is a pretty simple recipe because I made it for beginners. Many online French bread recipes call for a number of different “rising” periods, complex rolling & shaping of the bread, adding steam inside the oven, etc. However, my French bread recipe does not include these steps because I believe that bread machine recipes should not be too complicated. Let professional bakers make the fancy, over complicated and expensive baguettes while you make some easy, delicious and very inexpensive homemade French bread & baguettes for your family.
Tender Inside of Bread Machine French Bread (Baguette)

Please be aware that this is not the usual set & forget bread machine recipe. You will have to shape the bread in order to create the classic baguette shape (versus getting the standard bread machine “block” shape). Moreover, given the baguette shape, this French bread needs to be finished in an oven. Nevertheless, this bread machine recipe is much easier than making French bread by hand! It also looks much nicer than a “block” of bread machine bread.
Ingredients – Bread Machine French Bread (Baguette)
- 1 1/3 Cups – Water (warm) – 307 milliliters
- 3 1/2 Cups – Bread Flour – 420 grams
- 1 Teaspoon – Salt – 6 grams
- 2 Teaspoons – Bread Machine Yeast (Instant Yeast) – 7.2 grams – Not active dry yeast
- 2 Tablespoons – Olive Oil – 30 milliliters – The olive oil is not added to the bread pan. It is used to coat the dough later before baking.
Servings – Roughly 12 slices per medium baguette
Equipment Needed – Measuring cup & spoons, flexible spatula, oven mitts, large cutting board, baking sheet, pastry brush, cooling rack, oven… and of course, a bread machine!
Need any of these tools? Check out my bread making equipment page.
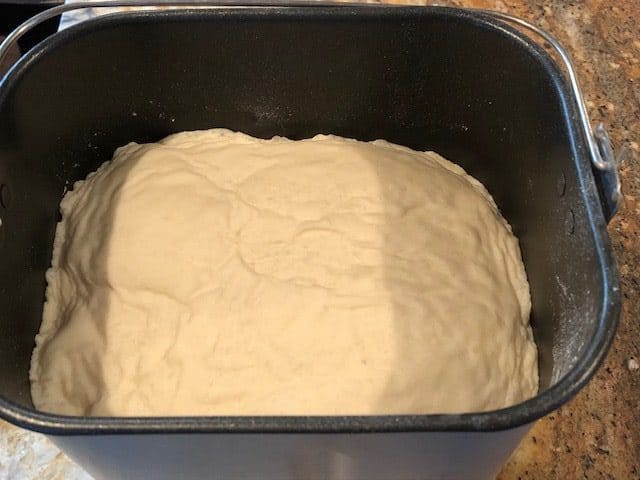
French Bread Dough from a Bread Machine
Instructions
- Unplug the bread machine & then remove the bread pan.
- Place the water and then the rest of the ingredients into the bread pan. You can make a little indent on top of the flour in order to avoid the yeast falling into the water (until the machine starts). Do not combine the salt with the yeast (as the salt can kill the yeast). Place the yeast & salt in separate parts of the bread pan.
- Place the bread pan back into the bread machine & then plug in the bread machine.
- Put your machine on the “Dough” setting and press the start button. In our bread machine, the kneading & rising on the dough setting takes about 1:30 hours.
- When your bread machine has finished, unplug the machine & pour the dough onto a cutting board. Wear oven mitts (as the bread pan/bread machine may be hot). Sprinkle some flour on the cutting board (before you pour the dough) in order to avoid the dough sticking to the cutting board.
- Divide the dough into 4 equal parts if you want to make 4 skinny baguettes (roughly 12 inches long). Or divide the dough into 2 equal parts in order to make 2 thicker French bread “rolls”. FYI – I usually make 2 thicker & longer loaves with this recipe.
- Roll the divided dough with your hands into your preferred shape (e.g. baguette or thicker bread roll). See our tips below on shaping the bread dough (especially about making the dough roll about 1/2 the width of your desired end product… as the dough expands as the yeast rises).
- Place the shaped dough onto a nonstick baking sheet.
- Coat the dough with olive oil. Use a small pastry brush.
- Cover the dough & baking sheet with a light kitchen cloth or plastic wrap in order to protect from dust, etc.
- Let the dough rise for 45 to 60 minutes. FYI – This time can vary. The speed of the rise is based in part on the temperature of your kitchen (e.g. rise faster in the summer & slower in the winter). See the “poke test” info in the tips section below on how to determine if your dough has risen/proofed to the correct level (and it is not under or over proofed). I like to start my poke testing around 35-40 minutes (as I would rather be too early versus too late).
- During this “rising” time, preheat your oven to 450 degrees F.
- After the 45 to 60 minutes, remove the covering from the dough and “score” (slice) the top of each dough roll with a sharp knife. Make diagonal slices about 1/2 inch deep and about 3 inches apart. This will help prevent the bread from cracking during baking. See the tips below about how to score bread.
- Place the baking sheet in the oven. It should bake at 450 degrees for 15-20 minutes or until golden brown. Wear oven mitts.
- At the 8-10 minute mark, turn the baking sheet around in order to ensure an even “browning” of the bread. Wear oven mitts.
- Remove the baking sheet when done and place the bread on a cooling rack. Wear oven mitts.
- Please read the tips section below for extra information on how to make this recipe successfully & to avoid common bread machine problems.
If you liked this recipe, please leave a comment below & give it a 5 star rating. Jump to comment section
📌 Save this recipe – Bookmark or pin it
| ❤️Love bread machine recipes? Then subscribe to my Bread Dad newsletter |
Helpful Tips
- The tips below are designed to help bread machine “novices” and/or people with limited baking experience.
- Click on this “print recipe” link if you want to print out this recipe. It includes all of the recipe’s ingredients and instructions. However, the recipe print function does not include my tips section. Please read the tips section in order to avoid common recipe problems.
- This recipe is part of Bread Dad’s series on easy Bread Machine Recipes such as banana bread, extra soft white bread, multigrain bread, bagels and Italian bread.
- Traditional French breads (baguettes) are made with only flour, water, yeast and salt. According to Wikipedia, “The ‘baguette de tradition française’ is made from wheat flour, water, yeast, and common salt”. Of course, you will find more modern “French bread” recipes that include other ingredients (but classic French baguette recipes only use 4 simple ingredients). If you want to experiment with European breads that contain other ingredients (such as sugar or olive oil), please visit my Bread Machine Italian Bread recipe.
- Visitor variations – In the comment section, Steve said “I also make other bread dad recipes but this is my favourite, sometimes adding a twist like garlic or jalapeño pieces”
- This recipe is NOT for 1 lb capacity bread machines. Please check the capacity of your bread machine before making this recipe. The dough will be too large for your machine and overflow the bread pan. An example of a bread machine with only a 1 lb capacity is the Zojirushi Home Bakery Mini Breadmaker (model BB-HAC10).
- Use FRESH ingredients for the best results. Ingredients that have been sitting in the pantry for months can become stale or pick up weird smells & flavors.
- Try to keep your ingredients (e.g. flour) in airtight food containers in order to extend their shelf life. For example, airtight containers help to prevent ingredients from absorbing moisture from the air. They also prevent potential contamination from pests, dust, etc.
- Flour (if stored in an open bag and not in an airtight container) can absorb a lot of moisture from the air. This extra moisture throws off recipes and can lead to bread collapses, etc.
- My recipe is based on using bread flour. Many bread recipes use bread flour instead of all purpose flour. Why? Because bread flour has more gluten than all purpose flour. This helps to add “structure” to the bread and capture more of the CO2 “bubbles” put out by the bread yeast. Thus bread flour breads tend to be fluffier than all purpose flour breads.
- This recipe will NOT work with gluten free flour. Gluten free flour differs significantly versus flours with gluten and requires you to use recipes specifically designed for the use of gluten free flour. If you use gluten free flour in this recipe, you are likely to have a baking disaster.
- If you are having trouble shaping your baguette, here are links to a couple of instructional Youtube videos
- King Arthur Baking – How to Shape a Baguette
- The Artisan Crust – Shaping Baguettes
- If you want to make a fatter & shorter “batard-style” French bread, here is another Youtube shaping video
- Artisan Bread School – Shaping the Batard
- After shaping the dough, the dough can double in size during the time when it is left to rise on the baking sheet/baguette pan (before it is put in the oven). Therefore, you need to roll your dough so it is roughly 1/2 the width of your planned French bread final width. If you roll the initial dough into a normal baguette-sized loaf (before the final rise begins), it will be a much larger than expected bread after it finishes rising.
- If anything is a little odd after the dough rises (i.e. a bit of the dough is sticking out), you can GENTLY press it back into shape. However, be gentle and don’t lift the dough because you don’t want to crush the airy dough.
- Do not add too much flour to the cutting board before shaping the dough. Just a light dusting of flour spread around evenly on the cutting board surface.
- Too much flour on the cutting board makes it harder to shape the dough correctly because the dough loses its grip (stickiness), can dry out the dough, etc.
- Don’t worry if your French bread develops some small “cracks” while baking even if you scored the bread. French bread is tough to make perfectly when you start out (because cracking can occur if the dough is too dry, too wet, etc.). However, one French bread secret is to let the dough fully rise before putting it in the oven so the French bread doesn’t expand too much during the baking process. Nevertheless, even with a few small cracks, your French bread will look great and taste fantastic!
- Some people use specialized baguette pans (for oven baking) in order to create a perfectly round shape for their French bread. These curved French bread pans also help prevent the bread machine French bread from spreading (widening too much) during the baking process. FYI – I just use a regular bread/cookie baking tray or sheet because I don’t mind a flat bottom on my French bread!
- If you have run out of bread flour, you can use all-purpose flour to make bread machine French bread. An all-purpose flour French bread might not be as fluffy/airy (as if you used bread flour) but it is still pretty good.
- Do not use cold water because that will inhibit the growth of the yeast. If you use cold water, your bread may have trouble rising properly.
- The ideal temperature for liquid ingredients used when making bread dough is around 100-110 F. Cold liquids (such as water & milk straight from the refrigerator) will slow yeast growth and liquid ingredients that are 140 F or above can kill yeast.
- FYI – Some people like to use a digital bread thermometer to measure the temperature of their liquid ingredients when making bread.
- “Scoring the bread” means cutting slices into the top of the dough. I like to use diagonal slices that are roughly 2-3 inches apart and about 1/2 inch deep. Scoring allows the bread to expand during the baking process without cracking at the seams. Many professional bakers use scoring in order to add fancy designs to their breads. As you get comfortable with making a bread machine French baguette, you can experiment with different scoring patterns.
- To score the bread, you will need a very sharp & thin knife or a professional scoring tool (bread lame) in order to avoid tugging at the dough while you slice. Some people also like to use a razor blade or Exacto knife to score their bread.
- Be aware that many “regular” kitchen knives have problems when scoring dough (as they tug on the dough and/or compress the “air” out of the dough as they cut).
- However, even if you have a sharp lame, it takes some practice to get the scoring done correctly.
- For more details on how to score dough properly, you might like to read these excellent articles:
- King Arthur Baking – Scoring Bread Dough
- Food & Wine – How to Score Bread Dough
- Bon Appetit – This Little Tool Takes the Stress Out of Scoring My Homemade Bread
- Or you might like to watch some “scoring” videos. Here are links to some YouTube videos that show you how to properly score your dough:
- King Arthur Baking YouTube Video
- Challenger Breadware YouTube Video
- Cooler home temperatures in the winter can impact the rise (proofing) of the dough. Ideally, your room temperature should be around 75-80 degrees F. Colder winter room temperatures can significantly delay the rise of the dough.
- These seasonal temperature differences can throw recipes. The time needed to proof the dough properly will vary by season (so a shorter rise time might be needed in the summer and a longer time is often needed in the winter). For example, the expected 45 to 60 minutes rise time after shaping the dough might take 60 to 90 minutes in a cold winter kitchen (or 30 to 40 minutes in a hot summer kitchen).
- The size of your loaf also impacts the rising time of the dough. For example, the dough for a thinner baguette needs less rising time than a thicker Italian bread.
- To see if the dough has “proofed” (risen) to the correct level, many people like to use the “poke test”. This is where you poke your finger into the dough (going in about an inch). If the poke hole rebounds immediately, you need to allow more time for the dough to rise further (it is “under proofed”). If the hole doesn’t come back at all, the dough has risen too much (it is “over proofed”). However, if the hole slowly fills over 2 to 3 seconds, the dough is at the right stage of proofing.
- If you want to learn more about the poke test, you might like to watch this YouTube video (not done by me).
- Unfortunately, the temperature of your kitchen can make the timing for this perfect poke result hard to predict (because there is a faster dough rise in hot kitchens and a slower rise in cold kitchens). Experience with “proofing” will make this easier (but it can be a problem for beginning bakers).
- If the dough is “under proofed” (hasn’t risen enough) when you place it in the oven, the bread is more likely to burst/crack when baked in the oven (as the still rising dough will push against the hardening crust and “burst” at the seams of the crust). Bakers try to get around this issue via testing for the right “proofing” level (e.g. use the poke test), “scoring” breads (slicing the top of the dough so the cracks occur where you want them), adding moisture inside the oven (so the dough doesn’t harden as quickly), etc.
- Don’t overproof the dough (let it rise too long). This occasionally happens when someone forgets about the rising dough and comes back hours later to check. Overproofed dough leads to deflated dough as well as flat and/or sunken bread tops. According to Wikipedia, “Overproofing occurs when a fermenting dough has rested too long. Its bubbles have grown so large that they have popped and tunneled, and dough baked at this point would result in a bread with poor structure.”
- Other factors that can impact the rise of the dough include old or expired yeast, contaminated yeast (e.g. the yeast was left in an open jar & air moisture contaminated it), water that is too cold or too hot, using heavily chlorinated tap water, placing salt next to or on top of the yeast (salt can kill yeast or inhibit its growth), not covering the dough during the rising period (as the exterior of the dough can dry out & limit the ability to rise), etc.
- My recipe uses bread machine yeast (instant yeast) and NOT active dry yeast.
- Bread machine yeast and instant yeast are not the same as active dry yeast. Bread machine yeast and instant yeast are added directly to the recipe’s ingredients. In contrast, active dry yeast must be pre-activated for 5-10 minutes in water/milk before being added to a recipe’s ingredients.
- If you haven’t used your bread machine in a long time, please buy some NEW bread machine yeast/instant yeast before making your bread. Old yeast can die or lose its potency and this will lead to bread that does not rise properly. Bread machine yeast may not be viable if it has been sitting in your pantry for years.
- If your dough is having trouble rising properly, you should check out my How To Test Yeast page. This yeast test will show you if your yeast is alive & active or dead/expired. It will save you from a few bread disasters!
- Bread machine French bread is much cheaper than buying some fancy bakery baguette. It is also much more fun to make your own freshly made bread versus driving across town on a snowy/rainy day in order to buy some day old French bread.
- You can easily turn your bread machine baguette into some delicious homemade garlic bread by cutting the French bread in half (lengthwise), slathering on some butter and minced garlic (onto the soft interiors of the bread halves) and then baking them in the oven!
- You can also turn this into French bread pizza by cutting the French bread in half (lengthwise), adding tomato sauce & cheese on top of the slices and then baking the slices in the oven.
- If you have a problem with a bread machine recipe, please make sure that you are following the recipe exactly (e.g. using the correct bread machine settings), you are using the correct amount of an ingredient (e.g. don’t eyeball the measurements versus using a measuring cup or accidentally add a teaspoon when a tablespoon is called for), you are using the correct ingredients (e.g. bread machine yeast versus regular yeast or bread flour versus all purpose flour), etc. Please don’t “wing” things with recipes.
- FYI – When making this recipe, many international bakers prefer to use a kitchen scale versus using measuring cups and measuring spoons. A kitchen scale provides greater accuracy because the amount of ingredients in a measuring cup can vary somewhat (e.g. a cup of fluffed flour vs a cup of densely packed flour). Therefore, this recipe also includes gram/milliliter measurements.
- According to Wikipedia, “In France, not all long loaves are baguettes; for example, a short, almost rugby ball-shaped loaf is a bâtard (literally, bastard), or a “torpedo loaf” in English… Another tubular shaped loaf is known as a flûte, also known in the United States as a parisienne. Flûtes closely resemble baguettes but are about twice the size. A thinner loaf is called a ficelle (string). A short baguette is sometimes known as a baton (stick), or in the UK referred to using the English translation French stick… French breads are also made in forms such as a miche, which is a large pan loaf, and a boule, literally ball in French, a large round loaf. Sandwich-sized loaves are sometimes known as demi-baguettes or tiers. Italian baguettes, or baguette italienne, involves more spices and a denser texture, giving the baguette a slightly different, more Italian, taste.”
- Kitchen humidity can impact a recipe. A winter kitchen tends to be drier due to your heating system drying out the air. In contrast, a kitchen in the summer can be much more humid. This change in humidity impacts baking as flour can soak up humidity from the air. Therefore, you might have to add 1-2 teaspoons of liquid in the winter if the dough is looking too dry. Or you might have to add 1-2 teaspoons of flour in the summer if the dough is looking too wet. If your kitchen is very dry or humid, you might have to add even a little more (but start with 1 teaspoon at a time until you achieve the right consistency). Of course, excessive kitchen humidity or dryness can impact a recipe at any time during the year (not just in the summer & winter)!
- This is one of the reasons that people should store flour in an airtight container if they have already opened the flour package. The flour will pick up extra moisture from the air while sitting in the pantry and this can throw off recipes, spoil flavor, degrade shelf life, etc.
- Make sure that your oven has been completely preheated. If the oven has not been properly preheated, your bread could come out under baked.
- It takes roughly 10-20 minutes to preheat most ovens with some variability due to the size of the oven, planned baking temperature (hotter takes longer), etc.
- If your oven does not have a built-in thermometer, you can buy an inexpensive hanging oven thermometer that you can place inside your oven (in order to correctly gauge the temperature & see if the oven has been preheated to the correct temperature).
- Moreover, some ovens can be 25-50+ degrees F hotter or colder than the number you set with your oven dial. An oven thermometer (which usually costs less than $10) is an easy way to measure the actual temperature inside your oven.
- If you would like to read my review of the bread machines that I own & use to create my bread machine recipes, please visit my Best Bread Machines page. It covers bread machines such as Hamilton Beach, KBS and Zojirushi. The page points out their strengths and weaknesses.
- If you start substituting ingredients (e.g. using different types of flour), you are experimenting and should not expect similar results to the recipe shown above. Experimenting can be fun. However, you should expect some successes but more potential disappointments when you start to experiment with recipes. For example, if you substitute whole wheat flour for the bread flour, you will probably experience a problem (as whole wheat flour doesn’t rise nearly as well as bread flour). Moreover, whole wheat flour has a totally different flavor.
- Be aware that some bread recipes may differ slightly between different types of bread machines. Therefore, please read your bread machine manufacturer’s instructions for basic bread recipes (e.g. white bread or whole wheat bread) as these are more likely to work on your individual bread machine.
- You can also use this homemade bread to make one of Bread Dad’s hot & toasty Grilled Cheese & Panini Recipes such as chicken paninis and ham & cheese paninis.
- My recipes are based on US ingredient measurements (e.g. US cups & tablespoons). However, as a courtesy to our European visitors, I have also included some very ROUGH European equivalents (e.g. grams & milliliters). Since I rarely use European measurements when baking, please let me know in the comment section below if any of the European ingredient measurements need to be changed (e.g. for XYZ ingredient, milliliters are more commonly used versus the grams information listed in the recipe).
- Always wear oven mitts/gloves when dealing with ovens & bread machines. They can get very hot.
- For more bread machine recipes (e.g. white bread, oatmeal bread, Italian bread, cornbread & pizza dough), you should visit Bread Dad’s section on easy Bread Machine Recipes.
If you liked this recipe, please leave a comment below & give it a 5 star rating. Jump to comment section
| 📌Follow Bread Dad on Facebook for recipes & baking tips! |
Want More Recipes? Try These Next
- Bread Machine Recipes – 90+ recipes for banana bread, sourdough bread, pizza dough, cinnamon raisin bread, etc.
- Bread Recipes – French bread, buttermilk bread, bagels, Italian bread, etc.
- Banana Bread Recipes – 60+ recipes for banana nut bread, eggless banana bread, chocolate chip banana bread, etc.
- Quick Bread Recipes – Recipes using baking soda such as pumpkin bread, cranberry bread, etc.
| Made this recipe today? Snap a photo & show it off on my Facebook page! |
French Bread Machine Recipe Questions
What is the traditional French bread called?
Traditional French bread is called a baguette. A baguette comes in a long narrow cylindrical shape. The word baguette means wand, baton or stick. French bread or baguette is typically made from flour, water, yeast and salt. Nevertheless, there are many other types of well-known breads from France such as the brioche, fougasse, pain de campagne, etc.
What is the French bread setting on my bread machine?
If your bread machine has a French bread setting, it will allow you to make a crusty “French-type” bread with your bread machine. However, the bread will not be in a baguette share. Rather the bread will be in the standard bread machine “block” shape. The resulting bread is basically a bread machine white bread recipe that has been baked longer and has a thicker crust.
If you want to make a French bread with a baguette shape, please try the bread machine recipe on this page. Or if you prefer a block shaped French bread loaf, please read the instructions/manual included with your bread machine because it should contain a basic French bread recipe that will work on your machine. However, be aware that some bread machines have a very limited number of settings and may not have a French bread setting.
Personally, I think that my bread machine French bread recipe creates a French bread that is much nicer and tastes better than the standard “block” bread machine French bread.
How to eat French bread?
You can cut French bread down the middle and add your favorite sandwich ingredients (e.g. cold cuts) in order to make it into a delicious hero or sub. Or cut the French bread into slices and slather on some butter, cream cheese or olive oil. Yum! In my opinion, French bread tastes even better when it is still warm.
What is the difference between French bread and Italian bread?
There are hundreds of different French and Italian breads so it is hard to generalize. However, in America, the typical “French” bread is usually made with just flour, water, yeast and salt. American-style French bread is also typically in a thin baguette shape and has a harder crust. In contrast, in America, the typical “Italian” bread may contain more ingredients such as milk and sugar. American-style Italian bread is also typically a wider loaf (versus a narrow baguette) and has a softer crust.
If you liked this recipe, please leave a comment & 5 star rating. Jump to comment section
Reference Sources
- Wikipedia, Baguette
- Wikipedia, Bread
- Wikipedia, Bread in Europe
- Wikipedia, Bread Machine

Bread Machine French Bread – Easy Baguette Recipe
Ingredients
- 1 1/3 Cups Water (warm) – 307 milliliters
- 3 1/2 Cups Bread Flour – 420 grams
- 1 Teaspoon Salt – 6 grams
- 2 Teaspoons Bread Machine Yeast – 7.2 grams – Not active dry yeast
- 2 Tablespoons Olive Oil (to coat dough) – 30 milliliters – The olive oil is not added to the bread pan. It is used to coat the dough later before baking.
Instructions
- Unplug the bread machine & then remove bread pan.
- Place the water and then the rest of the ingredients into the bread pan. You can make a little indent on top of the flour in order to avoid the yeast falling into the water (until the machine starts). Do not combine the salt with the yeast (as the salt can kill the yeast). Place the yeast & salt in separate parts of the bread pan.
- Place the bread pan back into the bread machine & then plug in the bread machine.
- Put your machine on the "Dough" setting and press the start button. In our bread machine, the kneading & rising on the dough setting takes about 1:30 hours.
- When your bread machine has finished, unplug the machine & pour the dough onto a cutting board. Wear oven mitts (as the bread pan/bread machine may be hot). Sprinkle some flour on the cutting board (before you pour the dough) in order to avoid the dough sticking to the cutting board.
- Divide the dough into 4 equal parts if you want to make 4 skinny baguettes (roughly 12 inches long). Or divide the dough into 2 equal parts in order to make 2 thicker french bread "rolls". FYI – I usually make 2 thicker & longer loaves with this recipe.
- Roll the divided dough with your hands into your preferred shape (i.e. baguette or thicker bread roll). See our tips below on shaping the bread dough (especially about making the dough roll about 1/2 the width of your desired end product… as the dough expands as the yeast rises).
- Place the shaped dough onto a nonstick baking sheet.
- Coat the dough with olive oil. Use a small pastry brush.
- Cover the dough & baking sheet with a light kitchen cloth or plastic wrap in order to protect from dust, etc.
- Let the dough rise for 45 to 60 minutes. FYI – This time can vary. The speed of the rise is based in part on the temperature of your kitchen (e.g. rise faster in the summer & slower in the winter). See the "poke test" info in the tips section below on how to determine if your dough has risen/proofed to the correct level (and it is not under or over proofed). I like to start my poke testing around 35-40 minutes (as I would rather be too early versus too late).
- During this "rising" time, preheat your oven to 450 degrees F.
- After the 45 to 60 minutes, remove the covering from the dough and "score" (slice) the top of each dough roll with a sharp knife. Make diagonal slices about 1/2 inch deep and about 3 inches apart. This will help prevent the bread from cracking during baking. See the tips below about how to score bread.
- Place the baking sheet in the oven. It should bake at 450 degrees for 15-20 minutes or until golden brown. Wear oven mitts.
- At the 8-10 minute mark, turn the baking sheet around in order to ensure an even "browning" of the bread. Wear oven mitts.
- Remove the baking sheet when done and place the bread on a cooling rack. Wear oven mitts.
- Please read the recipe's tips section on Bread Dad (BreadDad.com) for extra information on how to make this recipe successfully & to avoid common bread machine problems.
Notes
Nutrition
Related Recipes
- Bread Machine Banana Bread
- Bread Machine Cinnamon Raisin Bread
- Bread Machine Italian Bread
- Bread Machine Oatmeal Bread
- Bread Machine White Bread – Extra buttery
- Bread Machine Whole Wheat Bread
Please leave a comment & recipe rating in the comment box below. Thanks!