This bread machine bagels recipe is super easy and makes great-tasting bagels. You will never buy expensive store bagels again. I also love how bread machine bagels are relatively quick to make and how you can eat the bagels when they are still warm and toasty (versus trying to eat store bagels that have been sitting around for hours or even days)!
This recipe also shows you how to add a wide variety of bagel toppings to you homemade bagels (such as sesame seeds, onion flakes, poppy seeds, everything mix, cheese and multigrain).
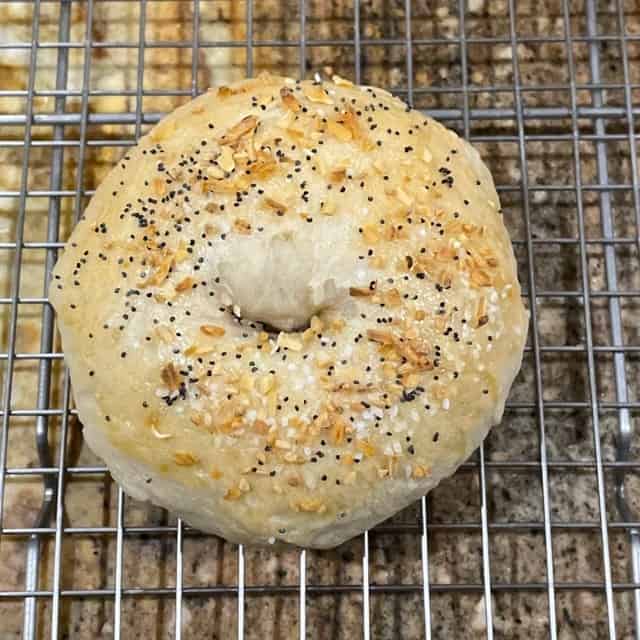
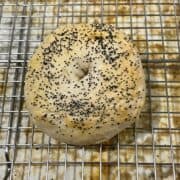
Bread Machine Everything Bagel
Recipe Sections
| Recipe RatingFeatured Comment Elizabeth “I have loved every recipe I’ve tried from your collection. These were my first attempt at bagels & now I want to make them every week. Easy to follow instructions and tips. I made everything bagels and they came out just like a bakery. Thank you” |
Homemade bagels are much better than semi-stale supermarket bagels and much cheaper than expensive bagel store bagels. Given these times of economic uncertainty, you can save money by baking delicious bread machine bagels at home.
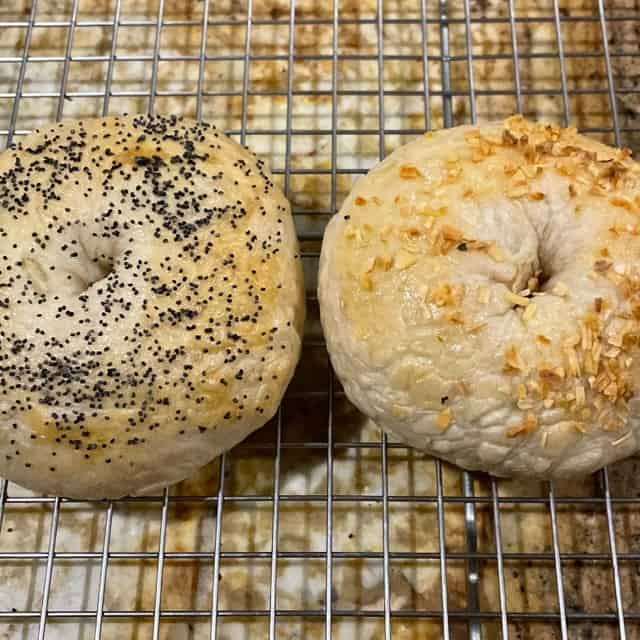
Bread Machine Poppy Seed Bagel & Onion Bagel
Ingredients
Bagel Dough
- 1 1/8 Cups – Water (warm) – 266 milliliters – 1 1/8 cups equals 1 cup plus 2 tablespoons
- 2 Tablespoons – White Granulated Sugar – 25 grams
- 3 Cups – Bread Flour – 360 grams
- 1 Teaspoon – Salt – 6 grams
- 1 1/2 Teaspoons – Bread Machine Yeast – 5.4 grams – Not active dry yeast
Optional – Egg Wash – To brush on top of the bagels before baking. The egg wash helps the bagel toppings (e.g. poppy seeds) to “stick” the bagel.
- 1 – Large Egg
- 1 Tablespoon – Water – 15 milliliters
Optional – Bagel Toppings
- Sprinkle your favorite toppings (e.g. poppy seeds, onion flakes, “everything” mix, etc.) on top of the egg wash. See the tips section for more information and additional topping ideas.
Servings – Roughly 7-8 medium bagels
Equipment Needed – Bread machine, measuring cup & spoons, large cutting board, large pot (for boiling water), oven mitts, large strainer spoon, pastry brush, baking sheet, wire cooling rack and an oven.
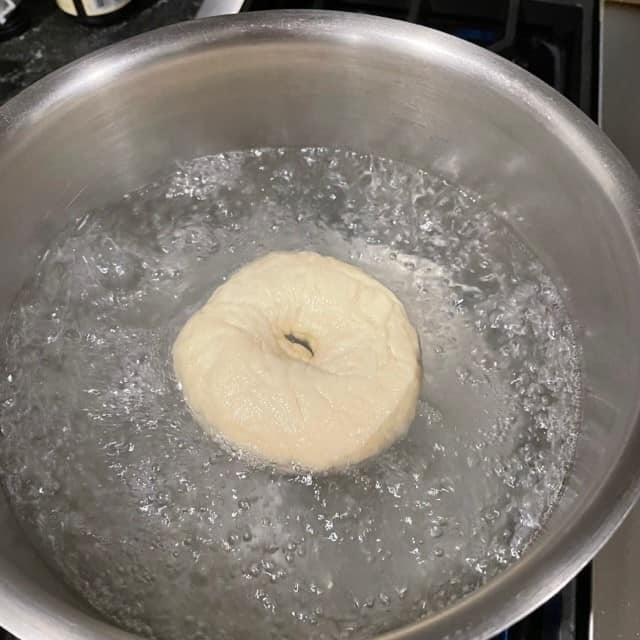
Bagel Dough is Placed in Boiling Water
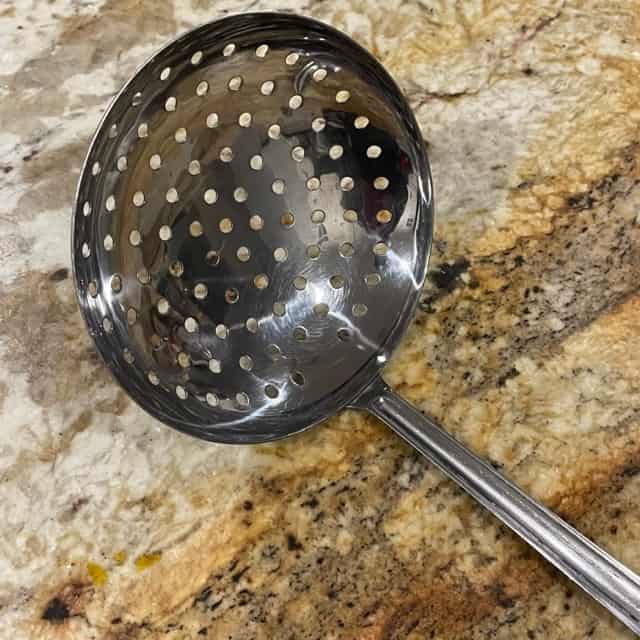
Use a Long Handled Strainer to Handle Bagel Dough in Boiling Water
Instructions
Make the Bread Machine Bagel Dough
- Unplug your bread machine and remove the bread pan.
- Pour the water into the bread pan and then add the rest of the dough ingredients. You can place the yeast in a little indent on top of the flour in order to avoid the yeast falling into the water (until the machine starts). Do not combine the salt with the yeast (as the salt can kill the yeast). Place the yeast & salt in separate parts of the bread pan.
- Place the bread pan (with ingredients) back into the bread machine and then plug in the machine.
- Put your machine on the Dough setting and press the start button.
- When your bread machine has finished, unplug the machine & pour the dough onto a cutting board. Wear oven mitts (as the bread pan/bread machine may be hot). Sprinkle a little flour on the cutting board (before you pour out the dough) in order to avoid the dough sticking to the cutting board.
Shape the Bagel Dough
- Cut the dough into 8 equal parts.
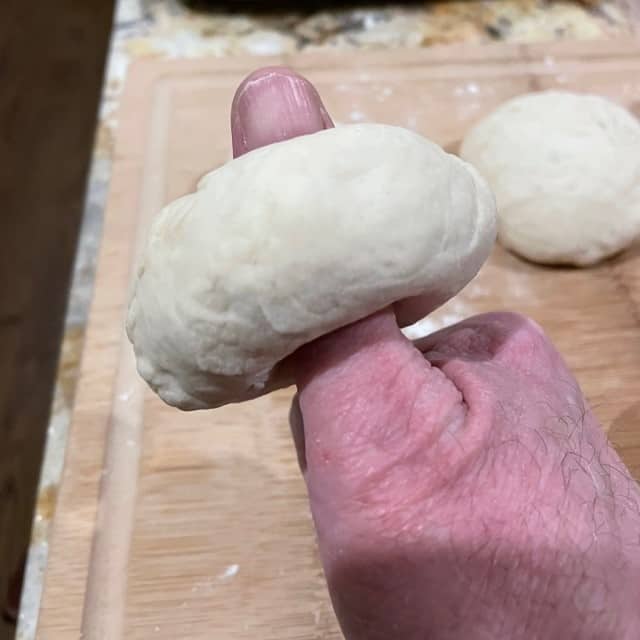
- Option 1 – Roll each dough “part” into a smooth ball, press down on the ball to form a thick bagel-like patty and then poke your thumb through the middle (see photo below). Wiggle your thumb around a bit to make a wider hole. FYI – This is my preferred method as I don’t like giant holes in my bagels.
- Option 2 – Roll each dough part into a dough “snake” or “rope”. Connect the ends of the rope together to make a ring of dough. FYI – This option results in a much wider hole in the bagel.
- If you are having trouble with shaping your bagels, there are shaping videos in the tips section below.
- Place each shaped piece of dough onto a non-stick baking sheet and cover the tray lightly with some plastic wrap. FYI – I like to place baking parchment paper on the baking sheet in order to prevent sticking (because some non-stick trays are not very non-stick!).
- After placing the dough on the baking sheet, you should wait for 10-15 minutes for the bagels to rest and partially rise on the baking sheet.
- During this 10-15 minute waiting period, you should fill a large metal pot with water and bring it to a full boil (not a simmering boil). Optional – Add 2 or 3 tablespoons of sugar to the water (BEFORE you begin to boil the water). This will help to improve the bagel crust.
- At the same time, preheat your oven to 375 degrees F. Your oven might take 15-20 minutes to preheat so turn the oven on early in order for it to preheat properly.
Boiling the Bagel Dough
- When dealing with boiling water, you should wear oven mitts. I also like to wear long sleeves in order to prevent any possible splashes from hitting my arms. Always be safe around boiling water (e.g. do not let children near the boiling water).
- Use a strainer with a long handle or a large “slotted” spoon (that has holes or slots in the “bowl” portion of the spoon) to gently place one bagel into the boiling water.
- Boil one bagel at a time in order to prevent the bagels from sticking to each other and/or causing mishappen bagels. Placing one bagel at a time into the boiling water also reduces the potential for accidentally splashing any boiling water.
- The bagels will float on top of the boiling water.
- Boil each bagel for 30 seconds on one side then gently flip the bagel over (with the long handled strainer) to boil the other side for 30 seconds. Don’t splash the boiling water. FYI – The bagel should boil for a combined time of 1 minute (30 seconds plus 30 seconds).
- After the 1 minute of boiling, you should remove the bagel with the long handled strainer and place the bagel on a wire cooling rack. FYI – I like to place a paper towel or a cloth towel under the wire cooling rack in order to soak up any excess water on the bagels.
- Repeat until all of the bagels have been boiled and have been placed on the wire cooling rack. Allow bagels to cool down & dry for 5 minutes.
- After drying, move the bagels to a nonstick baking sheet. FYI – I like to use a baking sheet covered with baking parchment paper.
Optional – Add Egg Wash & Toppings
- If you want to make something beyond plain bagels, you can add an egg wash to each bagel and sprinkle on your favorite toppings (e.g. poppy seeds or dried onion flakes).
- In a bowl, mix 1 egg and 1 tablespoon of water together. Stir until fully mixed.
- Paint the top of each dough bagel with a light coating of egg wash. FYI – I like to use a pastry brush to brush on the egg wash.
- Then sprinkle your favorite topping (such as poppy seeds or everything bagel mix) on top of the egg wash of each bagel. The egg wash helps the toppings “stick” to the bagel. FYI – You should not move the bagels from the baking sheet as you brush on the egg wash and add the bagel toppings.
Bake the Bagels
- Place the baking sheet with bagels (either plain bagels or bagels with toppings) into the preheated oven (which has reached 375 degrees F). Wear oven mitts.
- Bake the bagels for 20-25 minutes or until the crust reaches your preferred level of golden brown. Turn the baking sheet around (rotate) in your oven at 10-12 minute point in order to ensure an even browning of the bagels. Wear oven mitts. FYI – Do not touch any of the individual bagels. Just rotate the baking sheet.
- Remove the baking sheet from the oven. Wear oven mitts.
- Remove the bagels from the baking sheet with a spatula and place them on a wire cooling rack to cool down.
- Please read the tips section below in order to make this recipe successfully, change the texture of your bagels & avoid common bagel making errors.
If you liked this recipe, please leave a comment below & give us a 5 star rating. Jump to comment section
📌 Save this recipe – Bookmark or pin it
| ❤️Love bread machine recipes? Then subscribe to my Bread Dad newsletter |
Helpful Tips
- The tips below are designed to help bread machine “novices” and those who haven’t touched their bread machine in years.
- Click on this “print recipe” link if you want to print out this recipe. It includes all of the recipe’s ingredients and instructions. However, the recipe print function does not include my tips section. Please read the tips section in order to avoid common recipe problems.
- This recipe is part of Bread Dad’s series on easy Bread Machine Recipes such as bread machine banana bread, bread machine French bread and bread machine buttermilk bread.
- My bagel recipe works best in bread machines that have at least a 2 lb loaf capacity. The dough might overflow the bread pan in smaller compact machines.
- With this recipe, you can make a huge variety of different types of bread machine bagels. You are not stuck with just plain bagels. Below are some examples of the different bread machine bagels that you can make.
- Everything Bagels – Brush the egg wash on the shaped dough before placing the baking sheet in the oven. Sprinkle an “everything” bagel mix on top of the egg wash.
- FYI – I like to make my own “everything” mix by combining poppyseeds, dried onion flakes, dried garlic flakes and a little coarse salt. However, you can also buy premade “everything” mixes online.
- Poppy Seed Bagels – Brush the egg wash on the shaped dough before placing the baking sheet in the oven. Sprinkle poppy seeds on top of the egg wash.
- Onion Bagels – Brush the egg wash on the shaped dough before placing the baking sheet in the oven. Sprinkle dried onion flakes on top of the egg wash.
- Multigrain Bagels – Brush the egg wash on the shaped dough before placing the baking sheet in the oven. Sprinkle multigrain cereal (which consists of small bits of chopped grains and NOT large multigrain flakes) on top of the egg wash.
- Cheese Bagels – Brush the egg wash on the shaped dough before placing the baking sheet in the oven. Sprinkle your favorite shredded cheese on top of the egg wash. FYI – Many people like to use Asiago cheese when making cheese bagels. Others like to use cheddar cheese & chopped-up bits of jalapeno.
- Sesame Seed Bagels – Brush the egg wash on the shaped dough before placing the baking sheet in the oven. Sprinkle sesame seeds on top of the egg wash.
- Garlic Bagels – Brush the egg wash on the shaped dough before placing the baking sheet in the oven. Sprinkle dried garlic flakes on top of the egg wash.
- Whole Wheat Bagels – You just need to replace the bread flour with a 50/50 mix of whole wheat flour and bread flour. No other changes are required. Just follow the rest of the recipe.
- Salt Bagels – Brush the egg wash on the shaped dough before placing the baking sheet in the oven. Sprinkle coarse salt crystals (e.g. kosher salt) on top of the egg wash.
- Bacon Bits Bagels – Brush the egg wash on the shaped dough before placing the baking sheet in the oven. Sprinkle bacon bits on top of the egg wash.
- Visitors – What is your favorite topping to add to your bread machine bagels (e.g. an “everything” mix, dried onion flakes, poppy seeds, dried garlic flakes or cheese)? In addition, do have any tips on how to make homemade bagels even better? Please post your bagel suggestions in the comment section below. Your comments & suggestions are a great help to beginning bagel makers.
- Visitor variations (from the comments section below) – Nancy said “my favorite is jalapeno cheddar bagels. I used 2 jalapeños in food processor seeds and all and 1 cup sharp cheddar”, Kristy stated “I have made these multiple times and they always turn out great. I use 1.5 cups bread flour and 1.5 cups whole wheat flour”, Ronica added “malted barley syrup” to the water (FYI – malted barley syrup helps to create a shinier bagel crust, adds flavor, etc.), Tarryn added “crispy onions, sesame seeds, and a little Parmesan cheese”, Robin added “Added 3tbl diced pickled jalapeño to the dough in the machine, then topped with a couple jalapeño slices and a slice of Swiss cheese”, Martha “1 1/2 tsp of ground cinnamon to the dough, and added golden raisins”, Nancy added 1 cup of “dehydrated blueberries”, April added “jalapenos” & “shredded cheddar”, Margaret added “Parmesan as a topping”, Julie added “onion flakes to the dough and topped them with the onion flakes”, Sarah added some “truffle salt” as a topping, Aubear made “whole wheat & bread flour bagels”, Jake added “cinnamon” & “raisins”, Elizabeth made “everything bagels”, Em added “fresh garlic and herbs”, Mary “used everything bagel spice with extra onion flakes and dried garlic”, etc.
- Below are more advanced visitor variations. FYI – You should master basic bagels before trying these variations.
- Eileen made “4 flagels (flattened bagels, press dough down), then 4 ropes. Used 2 for bagel sticks and wrapped the last 2 around hot dogs.”
- Jessica made some chocolate chip bagels (and avoided the problem of the boiling water melting any chips on the outside of the bagel & creating a giant mess). She posted the following tips – “I gently kneaded in a handful of chocolate chips into the individual pieces. I shaped my pieces into bagels. I was sure to fold in the chocolate chips so none of them were or exposed on the surface of the dough. I then boiled and baked each bagel. They came out perfect. Chocolate chips held up just fine. The bagels tasted great.”
- Margaret likes to use this bagel recipe to make “bagel sticks“. She said “If you don’t care about shape, make bagel sticks instead. Same taste, easier. You may have to adjust the baking time.”
- Christina turns her bagels into pizza bagels. She said “Loved your detailed instructions. Left ZERO room for error and I certainly am grateful for that. SOOOO SOFT and chewy. I made some plain bagels and topped some with sauce, cheese and pepperoni for pizza bagels”.
- Visitors – How do you like to eat your bagels? With cream cheese or guac for breakfast? As lunch sandwiches? As pizza bagels? Please post your bagel “meal” ideas in the comment box below.
- Since you are making your bread machine bagels at home, they probably won’t all be perfectly shaped like machine-made bagels. But they will look pretty good and taste even better (in my opinion) than most grocery store bagels.
- Here are two easy bagel shaping techniques:
- Option 1 – Divide the dough into 8 equal-sized portions. Roll each dough part into a smooth ball, press down on the ball to form a thick bagel-like patty and then poke your thumb through the middle. Wiggle your thumb around a bit to make a wider hole. FYI – If you have a small thumb and/or don’t widen the hole with your thumb, the bagel hole will be pretty small (as the dough will expand to partially fill in the hole).
- I generally use the “thumb” technique because it is faster and I don’t like giant holes in my bagels. Smaller holes mean less “leakage” in the middle of the bagel if you are using the bagels for sandwiches, etc. FYI – Option 1 usually generates a softer airer bagel because there is more “interior” bagel (less exterior crust) created versus option 2.
- FYI – Do not make the “thumb hole” too small or the bagel hole might fill in as the dough expands (from the yeast).
- Option 2 – Divide the dough into 8 equal-sized portions. Roll each dough portion into a rope or snake shape and then attach the ends of the dough together to form a ring of dough. This creates a much larger interior hole for the bagel. This technique is a little harder to do correctly than option 1 because you have to correctly “seal” the ends of the bagel ring.
- FYI – Option 2 creates a bagel with more crust and less interior versus option 1. It also creates a slightly smoother bagel crust because the dough is more tightly rolled and the bagel dough is heated faster than option 1 (due to the lower interior volume).
- If you are having trouble shaping the bagel dough, you should watch these bagel shaping instructional videos:
- King Arthur Baking – How To Shape Bagels – This video looks at option 1 & option 2 shaping techniques.
- Bread Ahead – Shaping Bagels – This video concentrates on option 2.
I Like to Use the Thumb Technique
- After shaping the bagel dough and placing the dough on the baking sheet, do not forget to let the dough rest for 10-15 minutes. This allows the dough to rise and creates softer & airier bagels. FYI – During the shaping process, some of the air pockets formed by the yeast are compressed so the dough needs this rest period to rise again.
- If you want denser (less airy) bagels with a smoother crust, let the dough rest for only 8-10 minutes.
- Don’t over proof your bagel dough!! If you let the dough rest too long after shaping, the bagel can come out semi-deflated or puckered during the boiling process. Use a timer with an alarm to remind yourself when the rest period has finished (and so you don’t forget and let the dough rest for too long).
- Of course, the heat of your kitchen can impact the rise of the bagel dough. A cold kitchen slows yeast growth while a hot kitchen can accelerate yeast growth. Too much yeast growth (due to a hot kitchen) can lead to over proofing of the dough & the bagel crust is more likely to come out lumpy/puckered when boiled. So be conservative with the dough rest time if you have a hot kitchen.
- FYI – Supermarket bagels use machines to mass produce bagels. They also often chill the bagel dough in order to slow yeast growth (and thus create more uniform & smooth skinned bagels). Nevertheless, I prefer the fun of making & the look of homemade bagels. More interesting & more variety!!
- If your bread machine has 2 different dough settings, you want to use the “leavening” dough setting because that setting mixes, kneads & PROOFS (leavens) the dough in the bread machine. The leavening/proofing stage of dough making is where the yeast produces carbon dioxide gas and causes the dough to rise. An “unleavened” dough setting just mixes & kneads the dough (no proofing stage). On my Hamilton Beach, the leavening dough setting runs for about 1:30 hours. A non-leavening dough setting will be much shorter.
- My recipe boils the bagel for only 1 minute (as I like softer bagels with thinner crusts). However, you can boil the bagels for 2 minutes (1 minute on each side) if you like denser bagels with thicker crusts. FYI – You should try my 1 minute version first before experimenting with the 2 minute option. Then decide which method fits your family’s bagel taste preferences.
- You need to use boiling water (not simmering water) to make bread machine bagels. Wait until the water comes to a full boil before adding the bagel dough.
- Be safe with boiling water. Wear oven mitts and long sleeve shirts to avoid any splashes of boiling water. Do not throw the bagel dough into boiling water. You do not want the boiling water to splash. Use a “bagel skimmer” (a long-handled strainer or slotted spoon) in order to gently place the bagel dough into the water and to remove the bread machine bagels from the boiling water. Keep children away from boiling water.
- I bake my bagels for 20 minutes as I like softer “whiter” bagels. However, if you like darker bagels with harder crusts then bake them for 25 minutes. Of course, the size and shape of your bagel can impact the baking time. A skinny bagel with a big hole in the middle will bake faster than a fat bagel with a small hole in the middle.
- Are you curious about the difference between New York-style bagels and regular bagels? According to Wikipedia, “A traditional New York-style is typically larger and fatter than a mass-produced bagel” and “Many people claim the main difference in taste and texture of a real New York bagel compared to other styles of bagels, is due to the use of New York City tap water, which contains certain minerals which they attribute to creating a better bagel, specifically the low concentrations of calcium and magnesium found in New York water, which makes the water softer.” For more on New York-style bagels, please read this Wikipedia page.
- This bagel recipe involves working with boiling water and a hot oven, which can cause serious burns if not handled carefully. Use caution when lowering bagels into boiling water and removing them, as splashing may occur. Always use oven mitts when dealing with boiling water and handling hot trays and ovens.
- Bagel “Uses” – Beyond the classic bagels & cream cheese for breakfast, here some other ways to use bagels.
- Toasted Bagels – You can cut the bagels in half and toast them in a large toaster. This makes the bagels nice & crispy (great for day old bagels). You can also toast them in a toaster oven, larger kitchen oven or even “toast” them in a frying pan with a little butter.
- Pizza Bagels – Cut some bagels in half and place them on a baking sheet. Then spread some tomato sauce on the soft side of the bagel halves. Then sprinkle some shredded cheese on top of the sauce. Don’t add too much as you don’t want the sauce & cheese going all over the place. Finally, place the baking sheet in the oven and bake.
- Bagel Sandwiches – Cut the bagels in half and then add your favorite spread (e.g. mayonnaise or mustard), some cold cuts and some veggies (e.g. lettuce). Or turn them into bagel breakfast sandwiches by adding an omelet and fried ham or sausages.
- Visitors – How do you like to use your bagels? For breakfast? Lunch sandwiches? Pizza bagels? Other? Please post your favorite bagel “use” in the comment section below.
- Use FRESH ingredients (e.g. flour) for the best results. Ingredients that have been sitting in the pantry for months can become stale or pick up weird smells & flavors.
- Try to keep your ingredients (e.g. flour) in airtight food containers in order to extend their shelf life.
- Moreover, flour can pick up extra moisture from the air while sitting in the pantry and this can throw off recipes (e.g. throw off the liquid-to-dry ingredient ratio).
- This bagel recipe uses bread flour and NOT all purpose flour. If you do not have any bread flour, you can use all purpose flour but the bagels will be less airy and less bagel like. Stick to bread flour for the best results.
- Do NOT use cold water to make this recipe. Cold water will slow the yeast growth and this will result in a denser bagel. The ideal temperature for the water added to this bread machine bagel recipe should be around 100-110 F.
- This bread machine bagel recipe uses bread machine yeast (instant yeast). It does NOT use active dry yeast.
- Bread machine yeast and instant yeast are not the same as active dry yeast. Bread machine yeast and instant yeast are added directly to the recipe’s ingredients. In contrast, active dry yeast must be activated in water/milk before being added to a recipe’s ingredients. If you try to use active dry yeast for this recipe, it is much less likely to work properly (as the recipe instructions & leavening time is based on the use of bread machine yeast).
- Make sure to use NEW bread machine yeast as old/stale bread machine yeast will have trouble rising properly.
- Bread machine yeast loses its potency over time. Generally, bread machine yeast lasts for only 3-4 months after you have opened the bottle. However, if the yeast is exposed to air & moisture (e.g. the bottle not sealed tight) or exposed to higher temperatures, the yeast will expire even more quickly.
- Once you have opened the bottle that contains the bread machine yeast, the yeast will last longer if you store the bottle in the refrigerator or freezer. Just make sure the bottle is sealed tight (as yeast will deteriorate quickly if exposed to air, moisture and/or heat).
- FYI – Some people like to use a tool known as a bagel slicer (or bagel guillotine) in order to perfectly cut their bagels in half. Great for making bagel sandwiches.
- Kitchen humidity can impact a recipe. A winter kitchen tends to be drier due to your heating system drying out the air. In contrast, a kitchen in the summer can be much more humid. This change in humidity impacts baking as flour can soak up humidity from the air. Therefore, you might have to add 1-2 teaspoons of liquid in the winter if the dough is looking too dry. Or you might have to add 1-2 teaspoons of flour in the summer if the dough is looking too wet. If your kitchen is very dry or humid, you might have to add even a little more (but start with 1 teaspoon at a time until you achieve the right consistency). Of course, excessive kitchen humidity or dryness can impact a recipe at any time during the year (not just in the summer & winter)!
- This is one of the reasons that people should store flour in an airtight container if they have already opened the flour package. The flour will pick up extra moisture from the air while sitting in the pantry and this can throw off recipes, spoil flavor, degrade shelf life, etc.
- Can you freeze bagel dough? You can but I would not recommend it. Some of the yeast will die when frozen (this results in a less soft bagel), the crust of dough dries out in the freezer, thawing frozen dough takes almost as long as making fresh dough in your machine, etc. IMO- Freshly made bagels are softer & taste much better than bagels made from frozen dough.
- If you have a problem with a bread machine recipe, please make sure that you are following the recipe exactly (e.g. using the correct bread machine settings), using the correct amount of an ingredient (e.g. don’t eyeball the measurements versus using a measurement cup or accidentally add a tablespoon when a teaspoon is called for), using the correct ingredients (e.g. bread machine yeast versus active dry yeast or bread flour versus all purpose flour), etc. Please don’t “wing” things with recipes.
- If you enjoyed making & shaping these bagels then check out my Bread Machine Hamburger Buns recipe. Another fun bread to make by hand!
- My recipes are based on US ingredient measurements (e.g. US cups & tablespoons). However, as a courtesy to our European visitors, I have also included some very ROUGH European equivalents (e.g. grams & milliliters). Since I rarely use European measurements when baking, please let me know in the comment section below if any of the European ingredient measurements need to be changed (e.g. for XYZ ingredient, milliliters are more commonly used versus the grams information listed in the recipe).
- Always wear oven mitts/gloves when dealing with a bread machine, hot oven, boiling water, etc.
- Before using any bread machine, you should read the bread machine manufacturer’s instructions in order to use the bread machine effectively and safely.
- For more easy bread ideas, please visit Bread Dad’s sections on Bread Machine Recipes and Easy Bread Recipes.
If you liked this recipe, please leave a comment below & give us a 5 star rating. Jump to comment section
| 📌Follow Bread Dad on Facebook for recipes & baking tips! |
Want More Recipes? Try These Next
- Bread Machine Recipes – 90+ recipes for banana bread, sourdough bread, pizza dough, cinnamon raisin bread, etc.
- Bread Recipes – French bread, buttermilk bread, bagels, Italian bread, etc.
- Banana Bread Recipes – 60+ recipes for banana nut bread, eggless banana bread, chocolate chip banana bread, etc.
- Quick Bread Recipes – Recipes using baking soda such as pumpkin bread, cranberry bread, etc.
| Made this recipe today? Snap a photo & show it off on my Facebook page! |
Questions & Answers
What happens if you don’t boil bagels before baking?
If you do not boil the bagels, you will be just making a roll with a hole in the middle! Boiling the dough helps to create the classic bagel crust & chewiness.
Do you flip bagels when baking?
There is no need to flip the bagels in the oven, especially if you have added toppings (e.g. poppy seeds) to the bagels. You do not want to dislodge the toppings. You just need to rotate the baking sheet in order to ensure an even browning of the bagels.
Reference Sections
- Wikipedia, Bagel
- Wikipedia, Bread Machine
- Wikipedia, New York-Style Bagel
Bread Machine Bagels (Easy Recipe)
Ingredients
- 1 1/8 Cups Water (warm) – 266 milliliters
- 2 Tablespoons White Granulated Sugar – 25 grams
- 3 Cups Bread Flour – 360 grams
- 1 Teaspoon Salt – 6 grams
- 1 1/2 Teaspoons Bread Machine Yeast – 5.4 grams – Not active dry yeast
Instructions
Make the Bread Machine Bagel Dough
- Unplug your bread machine and remove the bread pan.
- Pour the water into the bread pan and then add the rest of the dough ingredients. You can place the yeast in a little indent on top of the flour in order to avoid the yeast falling into the water (until the machine starts). Do not combine the salt with the yeast (as the salt can kill the yeast). Place the yeast & salt in separate parts of the bread pan.
- Place the bread pan (with ingredients) back into the bread machine and then plug in the machine.
- Put your machine on the Dough setting and press the start button.
- When your bread machine has finished, unplug the machine & pour the dough onto a cutting board. Wear oven mitts (as the bread pan/bread machine may be hot). Sprinkle a little flour on the cutting board (before you pour out the dough) in order to avoid the dough sticking to the cutting board.
Shape the Bagel Dough
- Cut the dough into 8 equal parts.
- Option 1 – Roll each dough "part" into a smooth ball, press down on the ball to form a thick bagel-like patty and then poke your thumb through the middle (see photo below). Wiggle your thumb around a bit to make a wider hole. FYI – This is my preferred method as I don't like giant holes in my bagels.
- Option 2 – Roll each dough part into a dough "snake" or "rope". Connect the ends of the rope together to make a ring of dough. FYI – This option results in a much wider hole in the bagel.
- If you are having trouble with shaping your bagels, there are shaping videos in the tips section below.
- Place each shaped piece of dough onto a non-stick baking sheet and cover the tray lightly with some plastic wrap. FYI – I like to place baking parchment paper on the baking sheet in order to prevent sticking (because some non-stick trays are not very non-stick!).
- After placing the dough on the baking sheet, you should wait for 10-15 minutes for the bagels to rest and partially rise on the baking sheet.
- During this 10-15 minute waiting period, you should fill a large metal pot with water and bring it to a full boil (not a simmering boil). Optional – Add 2 or 3 tablespoons of sugar to the water (BEFORE you begin to boil the water). This will help to improve the bagel crust.
- At the same time, preheat your oven to 375 degrees F. Your oven might take 15-20 minutes to preheat so turn the oven on early in order for it to preheat properly.
Boiling the Bagel Dough
- When dealing with boiling water, you should wear oven mitts. I also like to wear long sleeves in order to prevent any possible splashes from hitting my arms. Always be safe around boiling water (i.e. do not let children near the boiling water).
- Use a strainer with a long handle or a large "slotted" spoon (that has holes or slots in the "bowl" portion of the spoon) to gently place one bagel into the boiling water.
- Boil one bagel at a time in order to prevent the bagels from sticking to each other and/or causing mishappen bagels. Placing one bagel at a time into the boiling water also reduces the potential for accidentally splashing any boiling water.
- The bagels will float on top of the boiling water.
- Boil each bagel for 30 seconds on one side then gently flip the bagel over (with the long handled strainer) to boil the other side for 30 seconds. Don't splash the boiling water. FYI – The bagel should boil for a combined time of 1 minute (30 seconds plus 30 seconds).
- After the 1 minute of boiling, you should remove the bagel with the long handled strainer and place the bagel on a wire cooling rack. FYI – I like to place a paper towel or a cloth towel under the wire cooling rack in order to soak up any excess water on the bagels.
- Repeat until all of the bagels have been boiled and have been placed on the wire cooling rack. Allow bagels to cool down & dry for 5 minutes.
- After drying, move the bagels to a nonstick baking sheet. FYI – I like to use a baking sheet covered with baking parchment paper.
Optional – Add Egg Wash & Toppings
- If you want to make something beyond plain bagels, you can add an egg wash to each bagel and sprinkle on your favorite toppings (i.e. poppy seeds or dried onion flakes).
- In a bowl, mix 1 egg and 1 tablespoon of water together. Stir until fully mixed.
- Paint the top of each dough bagel with a light coating of egg wash. FYI – I like to use a pastry brush to brush on the egg wash.
- Then sprinkle your favorite topping (such as poppy seeds or everything bagel mix) on top of the egg wash of each bagel. The egg wash helps the toppings "stick" to the bagel. FYI – You should not move the bagels from the baking sheet as you brush on the egg wash and add the bagel toppings.
Bake the Bagels
- Place the baking sheet with bagels (either plain bagels or bagels with toppings) into the preheated oven (375 F). Wear oven mitts.
- Bake the bagels for 20-25 minutes or until the crust reaches your preferred level of golden brown. Turn the baking sheet around (rotate) in your oven at 10-12 minute point in order to ensure an even browning of the bagels. Wear oven mitts. FYI – Do not touch any of the individual bagels. Just rotate the baking sheet.
- Remove the baking sheet from the oven. Wear oven mitts.
- Remove the bagels from the baking sheet with a spatula and place them on a wire cooling rack to cool down.
- PLease visit Bread Dad's recipe tips section for more information on how to make this recipe successfully & to avoid common bread machine mistakes.
Notes
Nutrition
Related Recipes
- Bread Machine All Purpose Flour Bread – Country white bread
- Bread Machine Cinnamon Raisin Bread
- Bread Machine Hamburger Buns
- Bread Machine Oatmeal Bread
- Bread Machine White Bread – Extra buttery
- Bread Machine Whole Wheat Bread
Please leave a comment & recipe rating in the comment box below. Thanks!