
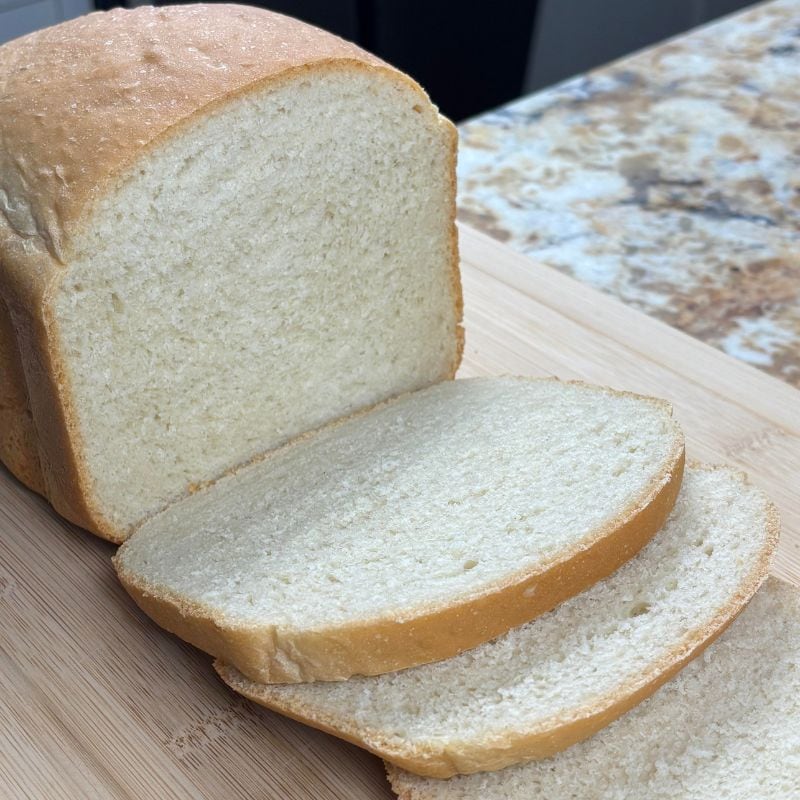
This low salt bread machine recipe creates a delicious & fluffy low sodium bread. It is a nice bread to use for sandwiches when you are trying to reduce your salt intake. As I have gotten older, I have become more conscious of my blood pressure and overall health. Therefore, I created a low sodium bread machine recipe in order to reduce my consumption of the salt commonly found in many sandwich breads.
Recipe Sections
Disclaimer: Bread Dad does not offer any medical or health advice. Please discuss any health issues with your doctor!
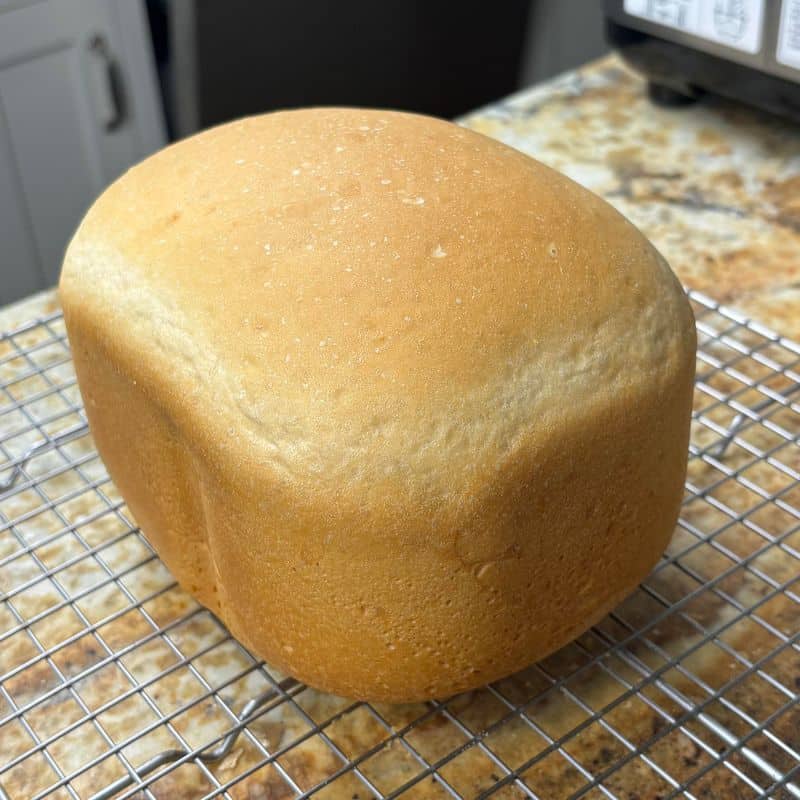
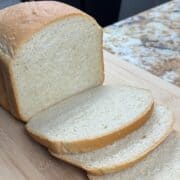
Low Sodium Bread Machine Recipe – Bread Cooling Down
Ingredients – 1.5 lb Recipe
- 1 Cup – Water (room temperature) – 237 milliliters
- 3 Tablespoons – Olive Oil – 45 milliliters
- 2 Tablespoons – Honey – 29 milliliters
- 1 Teaspoon – Food Grade Vinegar – 5 milliliters – Use a food-grade vinegar such as apple cider vinegar or white distilled vinegar. Do not use a cleaning vinegar.
- 1 Large Egg (lightly beaten) – Not extra large or jumbo eggs.
- 3 Cups – Bread Flour – 360 grams – Do not use all purpose flour.
- 1/4 Cup – Instant Mashed Potatoes – 14 grams – Use DRY instant mashed potato flakes. Do not use water moistened potato flakes or mashed potatoes.
- 1 Teaspoon – Onion Powder – 4 grams – Instead of onion powder, you can also use Italian seasoning or dried rosemary. 1 teaspoon of these ingredients is the bare minimum needed to mask the lack of salt (but many people prefer to use more). If you would prefer a stronger onion or herb flavor, please see the tips section below.
- 1/2 Teaspoon – Bread Machine Yeast (instant yeast) – 2 grams – Not active dry yeast.
Servings – Roughly 12 slices
Equipment Needed – Measuring cup & spoons, silicone spatula, oven mitts, cooling rack and a bread machine.
No Extra Added Salt (Beyond What Is In Recipe Ingredients)
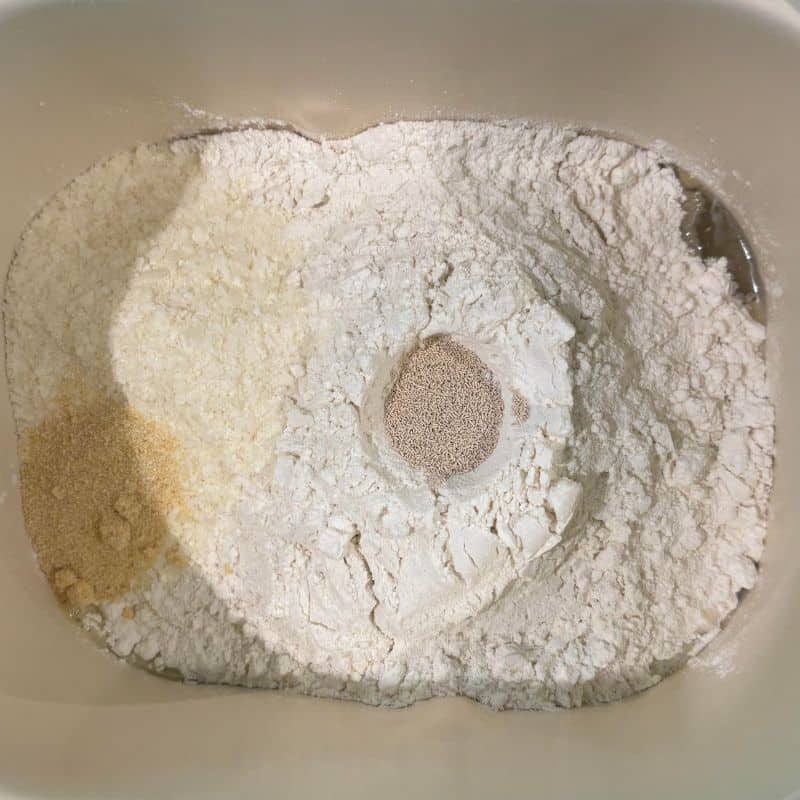
Low Sodium Bread Recipe Ingredients in the Bread Pan
Instructions – Low Salt Bread Machine Recipe
- Bread machine settings – 1.5 loaf, light color and “basic/white” bread setting.
- Lightly beat the egg.
- Unplug your bread machine.
- Remove the bread pan from the unplugged bread machine (so when you add the ingredients, they can not accidentally spill into the machine).
- Add the water, olive oil, honey, vinegar & egg into the bread pan and then add the other ingredients. Place the bread machine yeast in last and the yeast should not touch the liquid (until the bread machine is turned on and the ingredients start to be mixed together by the bread machine). FYI – Many bakers like to make a pocket in the center of the flour to hold the yeast.
- Put the bread pan with ingredients back into the unplugged bread machine.
- Plug in the bread machine. Enter the correct settings (1.5 lb, light color & basic/white bread) and press the “start” button.
- When the bread machine has finished baking the bread, unplug the bread machine and remove the bread pan from the bread machine. Wear oven mitts as the bread pan & bread machine will be hot.
- Remove the bread from the bread pan and place the bread on a wire cooling rack. Use oven mitts when removing the bread as the bread & bread pan will be hot.
- Optional – Right after you remove the hot bread from the bread pan and place it on the cooling rack, you can use a pastry brush to brush a very light coat of melted unsalted butter (roughly 1 tablespoon) on the top of the bread. This adds even more flavor to this low sodium bread. Be aware that this needs to be done when the bread is still hot (as the butter will not be properly absorbed into the crust of a cold bread).
- Let the bread cool down on the wire cooling rack for 1 to 2 hours before slicing the bread.
- Please read the tips section below for extra information on how to make this recipe successfully.
If you liked this recipe, please leave a comment below & give it a 5 star rating. Jump to comment section
Love bread machine recipes? Subscribe to my Bread Dad newsletter.
Get Recipes🛠 Bread Dad’s Troubleshooting Guides
- Collapsed Loaf: Why Did My Bread Machine Bread Collapse?
- Dense Bread: Why Is My Bread Machine Bread So Dense?
- Common Problems: 25+ Bread Machine Mistakes
- Banana Bread: Why Did My Banana Bread Sink In The Middle?
Helpful Tips
- The tips below are designed to help bread machine “novices” and those who haven’t touched their bread machine in years.
- Click on this “print recipe” link if you want to print out my recipe. It includes all of the recipe’s ingredients and instructions. However, the recipe print function does not include my tips section. Please read the tips section in order to avoid common recipe problems.
- This low salt bread machine recipe is part of Bread Dad’s series on easy Bread Machine Recipes such as banana bread, French bread, sourdough bread and multigrain bread.
- In case, you are wondering – If I want to make a low sodium bread, why can’t I just remove the salt from a regular bread machine recipe? Because beyond changing the bread’s flavor & texture, the missing salt will cause the yeast to grow uncontrolled. This usually results in the dough becoming too “slack” (loose & hard to hold its shape). Moreover, this lack of salt can cause the dough to rise too quickly and collapse back on itself in the machine.
- Is this my best tasting bread? No!! However, this low sodium bread tastes pretty good especially for a bread missing the flavor impact of salt. It uses flavor enhancers (such as onion powder or dried herbs) to mask the missing salt flavor.
- This is NOT a “no salt bread”. Why? Because there is a little salt in some of the ingredients such as the instant potatoes. However, since you are not adding extra salt to control the yeast growth, it is a much lower sodium bread than typical commercially packaged breads.
- When checking the package of instant potatoes (Idahoan) that I used to make this low salt bread machine recipe, the package’s ingredient section states that it contains 15 mg of sodium per 1/3 cup of dry mix. Of course, this amount of sodium varies by brand. Therefore, check the label to check the sodium level in your instant potatoes.
- Commercial packaged sliced bread often has lots of sodium per slice. In case you are curious, I just looked at the ingredient label on a package of sliced white bread made by a well known manufacturer. The label states that 2 slices of this commercial white bread has 230 mg of sodium (thus 1 slice has 115 mg of sodium). However, it doesn’t tell you the size of their slices and 1.5 lb & 2 lb bread machine slices are often bigger than some commercial packaged sandwich slices.
- Of course, the bread from other manufacturers might have more or less sodium per slice. So check the label of any commercial loaves to determine the amount of sodium in that bread.
- According to my nutrition calculator, my low salt bread recipe has roughly 9 mg of sodium per slice (based on making 12 slices from my 1.5 lb loaf recipe). Of course, these nutrition calculators give VERY ROUGH estimates so I wouldn’t completely rely on these sodium numbers. For example, the sodium estimate can differ based on what type of instant potato flakes you use (as some brands of instant potato flakes have more sodium than others).
- Visitors – How are you reducing the salt in your baked goods? Using carefully tailored recipes? Using salt substitutes? Adding more herbs & less salt? Please add your salt tips in the comment section below.
- Be aware that the ingredients (sandwich fillers) that you put between your bread slices can also contain sodium. For example, some cold cuts contain lots of sodium.
- Visitors – Do you have any great tasting ideas for low sodium or no sodium sandwich fillers? Please post your sandwich filler ideas in the comment section below.
- Many of the “extra” ingredients (e.g. onion powder/dried herbs, instant potato flakes and vinegar) are added to this low sodium bread recipe in order to improve the flavor, rise and/or moistness of the bread. There are more details about each ingredient’s benefit to this recipe further down in this tips section.
- Why add onion powder or dried herbs? Because these ingredients help to hide the lack of flavor caused by the missing salt in this low salt bread.
- As I stated above in the ingredients section, the amount of onion powder/dried herbs (called for in this recipe) is the bare minimum needed to mask the lack of salt. Therefore, the addition of an increased amount of a “flavor enhancer” (such as increased onion powder) will better mask the lack of salt.
- If you want to make a “true” onion bread or or herb bread, you should use 1 tablespoon of onion powder or dried herbs (such as Italian seasoning or dried rosemary). This will give the bread a more pronounced onion or herb flavor (as 1 tablespoon equals 3 teaspoons).
- Optional – Instead of extra onion powder (beyond the 1 teaspoon in the recipe), you can add 1 or 2 tablespoons of onion flakes. This adds more flavor to this low sodium bread.
- Optional – Or instead of onion flakes listed above, you can use 2 or 3 tablespoons of fresh chopped chives. This is another easy way to improve the taste & change the “look” of your low salt bread.
- Be aware that garlic powder has an anti-microbial effect on yeast and this slows the growth of the yeast. If you add lots of garlic powder to a bread recipe, you are more likely to end up with a short, dense loaf.
- To be safe, I would suggest first trying the onion powder or dried herbs with this low salt bread machine recipe (before experimenting with garlic powder).
- Visitors – What flavor additions did you use to replace the salt flavor? Onion powder? Dried herbs? Garlic powder? Crushed black pepper? Red pepper flakes? A mix of ingredients? Other? Post your flavor ideas in the comment section below.
- Why does this recipe use only 1/2 teaspoon of bread machine yeast? Other Bread Dad recipes seem to use at least twice as much. Salt helps to control the rise of the yeast in a recipe. Therefore, if you use less salt, you require less bread machine yeast. If I just cut out the salt and didn’t change the amount of yeast, the dough would likely rise too high and collapse back on itself.
- Since my recipe only uses 1/2 teaspoon of bread machine yeast, it is a slower rising bread. Don’t worry as the rise gets there eventually! You just need to be patient because you will get more of the rise later in the bread machine cycle.
- Why does this recipe include vinegar? Vinegar helps to strength the structure of bread. If you cut down on the salt in a bread recipe, the dough can become slack & loose. Vinegar can partially offset this missing salt by strengthening the gluten network. In turn, this helps to capture more of the CO2 put out by the yeast. Greater CO2 capture means you have an “airy” & better rising bread. Moreover, the acidity of the vinegar helps to slow the bread from going dry & stale.
- Less salt can result in a drier tasting bread. Why? Because salt is hygroscopic. This means that it attracts and holds onto water molecules. Therefore, you need to make adjustments to counter this potential dryness problem (such as adding olive oil, eggs, honey and/or instant potato flakes) when making a low sodium bread recipe.
- Why use honey instead of regular sugar? Honey is much more hygroscopic than white granulated sugar. This means that honey is a better option for retaining moisture and keeping the bread soft.
- Why add an egg? Less salt means a “structurally” weaker bread as salt helps to strengthen the gluten in bread. However, an egg helps to offset this problem by binding the dough and improving the bread’s structure & rise. An egg’s rich flavor also helps to hide the missing salt flavor. Moreover, an egg helps breads to taste moister due to its natural fats, lecithin and proteins.
- Why does this recipe use instant potato flakes? With less salt, homemade bread can taste dry. Instant potato is an ingredient that helps to retain the moisture in a bread. It also helps to create a softer bread.
- Why use olive oil instead of butter? Olive oil helps improve the moistness & softness of this bread. If I used butter, it would add a buttery taste but also result in a drier bread (as butter is a solid at normal room temps whereas olive oil remains a liquid).
- Your recipe does not use milk. Why? Because milk and milk alternatives (e.g. oat milk or soy milk) often contain sodium. They often contain either naturally occurring sodium or added sodium (added by manufacturers for “better” flavor).
- In contrast, water is usually very low in sodium or sodium free.
- For more information on where sodium might be “hiding” in your food, you might like to read this Wikipedia article focused on a Low Sodium Diet.
- You should use room temperature water (versus the usual 100 to 110 F recommended for bread machine recipes). Why? Because you do not want the yeast to grow too fast. Without the added salt, there is little to control the rapid growth of the yeast. Yeast will grow less vigorously when the water is at room temperature of 70 to 80 F (versus a more yeast friendly 100 to 110F).
- Optional – If you want to create a low sodium whole wheat bread, you can replace 50% of the bread flour in this recipe with whole wheat flour. This will add more fiber to the bread but it could also make the low sodium bread taste a little drier.
- IMO – I would not completely replace all of the bread flour with whole wheat flour. Why? Because whole wheat flour requires more moisture than bread flour (and thus a 100% whole wheat version of this low sodium bread recipe would require more recipe changes).
- Optional – If you want to add a little “crunch” to this low salt bread, you can add 1/4 cup of multigrain (chopped up grain seeds) or small seeds (e.g. chia seeds or flax seeds). You can add these items to the pan when you add the recipe’s dry ingredients (e.g. after you add the flour to the pan). These crunchy ingredients are usually low in sodium or sodium free (but always check an ingredient’s nutrition label to make sure).
- Optional – If you add a buttery top to your bread, make sure not to use too much melted butter on the crust or it will run off the sides of the bread. Also do not brush the melted butter on the loaf after the bread has cooled down (or the melted butter will not be absorbed properly into the crust & you will create a very greasy bread).
- Also remember to use unsalted butter to “baste” your bread (as regular butter contains a decent amount of sodium).
- For more “functional” bread machine recipes, you might like to explore Bread Dad’s recipes with fiber such as Bread Machine High Fiber Bread, Bread Machine 100% Whole Wheat Bread and Bread Machine Honey Wheat Bread.
- Or if you are looking for gluten free recipes, check out my Bread Machine Gluten Free Bread Recipe (GF sandwich bread) or Bread Machine Gluten Free Banana Bread (GF dessert recipe).
- Many bakers like to make a pocket in the top of the flour in order to hold the bread machine yeast in place (looks sort of like a small flour volcano with a yeast crater). This is done to prevent the yeast from falling into the liquid ingredients (and activating prematurely), coming into contact with the salt, etc. until the bread machine is turned on.
- I like to place the yeast in the center of the bread pan and the salt on the side of the pan. You want to keep the yeast and salt separated because the salt can kill the yeast.
- My recipe is based on bread flour (and not all purpose flour). A bread made with all purpose flour will NOT be as good as one made with bread flour. Most sandwich bread recipes use bread flour because bread flour has more gluten than all purpose flour. This helps to add “structure” to the bread and capture more of the CO2 “bubbles” put out by the bread yeast. Thus bread flour breads tend to be fluffier than all purpose flour breads.
- Moreover, since all purpose flour has less gluten than bread flour, breads made with all purpose flour do not hold together as well as breads made with bread flour. Gluten provides structural strength to bread. Breads made with all purpose flour often will “crumble” and/or break more easily when sliced (versus breads made with bread flour).
- This recipe will NOT work with gluten free flour. Gluten free flour differs significantly versus flours with gluten and requires you to use recipes specifically designed for the use of gluten free flour. If you use gluten free flour in this recipe, you are likely to have a baking disaster.
- Always use FRESH ingredients (e.g. bread flour and yeast) for the best results. Ingredients that have been sitting in the pantry for months can become stale or pick up weird smells & flavors.
- Try to keep your ingredients (e.g. flour) in airtight food containers in order to extend their shelf life. Airtight containers protect ingredients from moisture (in the air), pests, dust, etc.
- Flour (when stored in an open bag and not in an airtight container) can absorb a lot of moisture from the air. This extra moisture throws off recipes and can lead to bread collapses, etc.
- If you would like to read my review of the bread machines that I own & use to create my bread machine recipes, please visit my Best Bread Machines page. It covers bread machines such as Briskind, Hamilton Beach and Zojirushi. The page provides my thoughts on the machines’ strengths and weaknesses.
- This recipe uses bread machine yeast (instant yeast). It does NOT use active dry yeast.
- Bread machine yeast and instant yeast are not the same as active dry yeast. Bread machine yeast and instant yeast are added directly to the recipe’s ingredients. In contrast, active dry yeast must be pre-activated for 5-10 minutes in water/milk before being added to a recipe’s ingredients.
- If you haven’t used your bread machine or bread maker in a long time, please buy some NEW bread machine yeast before making your bread. Old yeast can die or lose its potency and this will lead to bread that does not rise properly. Bread machine yeast is not likely to be viable if it has been sitting in your pantry for years.
- Bread machine yeast loses its potency over time. Generally, bread machine yeast lasts for only 3-4 months after you have opened the bottle. However, if the yeast is exposed to air & moisture (e.g. the bottle is not sealed tight) or exposed to higher temperatures, the yeast will expire even more quickly.
- Once you have opened the bottle that contains the bread machine yeast, the yeast will last longer if you store the bottle in the refrigerator or freezer. Just make sure the bottle is sealed tight (as yeast will deteriorate quickly if exposed to air, moisture and/or heat).
- If your dough is having trouble rising properly, you should check out my How To Test Yeast page. This yeast test will show you if your yeast is alive & active or dead/expired. It will save you from a few bread disasters!
- You should let your bread COMPLETELY cool down before slicing. If you try cutting bread while it is still warm, you will squash & compress the bread and interfere with the bread slowly releasing the steam/water vapor from the interior. Premature slicing can negatively impact the bread by making the bread more gummy. FYI – It can take 1 to 2 hours for a bread to completely cool.
- Do not overbake your sandwich bread!! As soon as the bread machine done, you should remove the pan from the machine and then remove the bread from the pan. This applies to most sandwich breads made with a bread machine but always follow the recipe’s instructions for the best results.
- Do not forget the bread & let it sit in the bread machine or pan after the machine has finished baking. The residual heat will continue to bake the bread, drying it out and the loaf will turn into a rock!!
- Cool your bread on a wire cooling rack. This type of rack allows moisture to escape via all the sides of the bread (including the bottom of the loaf). FYI – A lot of moisture escapes through the paddle hole in the bottom of the bread.
- If you place bread on a cutting board or plate to cool down, the bottom of the loaf will become soggy. The escaping moisture has nowhere to go and is trapped by the plate/cutting board. This means that the bottom of your bread just sits in the trapped moisture.
- Cooler home temperatures in the winter can cause rising problems for bread dough. Ideally, your kitchen room temperature should be around 80 degrees F. Colder winter room temperatures can significantly delay the rise of the dough. You will need to raise the temperature of your kitchen (if you like a cold house in the winter) or find a warm spot for the dough to rise. I often put my dough (covered of course) next to a heating vent in the winter to make sure it is getting enough heat.
- Conversely, dough can rise faster than expected in a very hot kitchen.
- Kitchen humidity can impact a recipe. A winter kitchen tends to be drier due to your heating system drying out the air. In contrast, a kitchen in the summer can be much more humid. This change in humidity impacts baking as flour can soak up humidity from the air. Therefore, you might have to add 1-2 teaspoons of liquid in the winter if the dough is looking too dry. Or you might have to add 1-2 teaspoons of flour in the summer if the dough is looking too wet.
- If you have a problem with a “basic” bread machine recipe, please make sure that you are following the recipe exactly (e.g. using the correct bread machine settings), using the correct amount of an ingredient (e.g. don’t eyeball the measurements versus using a measuring cup or accidentally add a tablespoon when a teaspoon is called for), using the correct ingredients (e.g. bread machine yeast versus regular yeast or bread flour versus all purpose flour), etc. Please don’t “wing” things with recipes.
- If you start substituting ingredients (e.g. using different types of flour not called for in the recipe), you are experimenting and should not expect similar results to the recipe shown above. Experimenting can be fun. However, you should expect some successes but more potential disappointments when you start to experiment with recipes.
- You can also use this homemade bread to make one of Bread Dad’s hot & toasty Grilled Cheese or Panini Recipes. Or use it to make some popular “cold” Sandwich Recipes.
- My recipes are based on US ingredient measurements (e.g. US cups & tablespoons). However, as a courtesy to our European visitors, I have also included some very ROUGH European equivalents (e.g. grams & milliliters). Since I rarely use European measurements when baking, please let me know in the comment section below if any of the European ingredient measurements need to be changed (e.g. for XYZ ingredient, milliliters are more commonly used versus the grams information listed in the recipe).
- Before using any bread machine, you should read the bread machine manufacturer’s instructions in order to use the bread machine effectively and safely.
- Always wear oven mitts/gloves when dealing with a bread machine. The bread pan and the rest of the bread machine can get very hot during the baking process.
- For more bread recipes, please visit Bread Dad’s section on Bread Machine Recipes.
If you liked this recipe, please leave a comment below & give it a 5 star rating. Jump to comment section
Love bread machine recipes? Subscribe to my free Bread Dad newsletter.
Want more Bread Dad recipes? Check out these sections:
- Bread Machine Recipes – 90+ recipes such as banana bread, sourdough bread, pizza dough, cinnamon raisin bread, etc.
- Bread Recipes – French bread, buttermilk bread, bagels, Italian bread, etc.
- Banana Bread Recipes – 60+ recipes such as banana nut bread, eggless banana bread, blueberry banana bread, etc.
- Quick Bread Recipes – Recipes using baking soda such as pumpkin bread, cranberry bread, gingerbread, etc.
- Muffin Recipes – Muffins are delicious “mini” versions of banana breads & quick breads!
Reference Sources
- Wikipedia, Bread Machine
- Wikipedia, Low Sodium Diet
- Wikipedia, Salt
Low Salt Bread Machine Recipe
Ingredients
- 1 Cup Water (room temperature) – 237 milliliters
- 3 Tablespoons Olive Oil – 45 milliliters
- 2 Tablespoons Honey – 29 milliliters
- 1 Teaspoon Food Grade Vinegar – 5 milliliters – Use a food-grade vinegar such as apple cider vinegar or white distilled vinegar. Do not use a cleaning vinegar.
- 1 Large Egg (lightly beaten) – Not extra large or jumbo eggs.
- 3 Cups Bread Flour – 360 grams – Do not use all purpose flour.
- 1/4 Cup Instant Potato Flakes – 14 grams – Use DRY instant mashed potato flakes. Do not use water moistened potato flakes or mashed potatoes.
- 1 Teaspoon Onion Powder – 4 grams – Instead of onion powder, you can also use Italian seasoning or dried rosemary. 1 teaspoon of these ingredients is the bare minimum needed to mask the lack of salt (but many people prefer to use more).
- 1/2 Teaspoon Bread Machine Yeast (instant yeast) – 2 grams – Not active dry yeast.
Instructions
- Bread machine settings – 1.5 loaf, light color and “basic/white” bread setting.
- Lightly beat the egg.
- Unplug your bread machine.
- Remove the bread pan from the unplugged bread machine (so when you add the ingredients, they can not accidentally spill into the machine).
- Add the water, olive oil, honey, vinegar & egg into the bread pan and then add the other ingredients. Place the bread machine yeast in last and the yeast should not touch the liquid (until the bread machine is turned on and the ingredients start to be mixed together by the bread machine). FYI – Many bakers like to make a pocket in the center of the flour to hold the yeast.
- Put the bread pan with ingredients back into the unplugged bread machine.
- Plug in the bread machine. Enter the correct settings (1.5 lb, light color & basic/white bread) and press the “start” button.
- When the bread machine has finished baking the bread, unplug the bread machine and remove the bread pan from the bread machine. Wear oven mitts as the bread pan & bread machine will be hot.
- Remove the bread from the bread pan and place the bread on a wire cooling rack. Use oven mitts when removing the bread as the bread & bread pan will be hot.
- Optional – Right after you remove the hot bread from the bread pan and place it on the cooling rack, you can use a pastry brush to brush a very light coat of melted unsalted butter (roughly 1 tablespoon) on the top of the bread. This adds even more flavor to this low sodium bread. Be aware that this needs to be done when the bread is still hot (as the butter will not be properly absorbed into the crust of a cold bread).
- Let the bread cool down on the wire cooling rack for 1 to 2 hours before slicing the bread.
- Please read the recipe's tips section on Bread Dad (BreadDad.com) for extra information on how to make this recipe successfully.
Notes
Nutrition
Related Recipes
- Bread Machine Cracked Wheat Bread
- Bread Machine Gluten Free Banana Bread
- Bread Machine Gluten Free Bread – GF sandwich bread
- Bread Machine High Fiber Bread
- Bread Machine Honey Wheat Bread
- Bread Machine 100% Whole Wheat Bread
Please leave a comment & recipe rating in the comment box below. Thanks!